When talking to visitors at the Baker Street Irregular Astronomers events in London, there is often discussion about useful / interesting applications that people might have on their phone. This blog lists the various applications that I currently have on an Android phone that are useful for astronomers. There are many others available beyond this list, some of which may be better; these just happen to be the ones I currently use. Some are available for iOS too, or have equivalent options available.
Google Skymap (Free without ads)
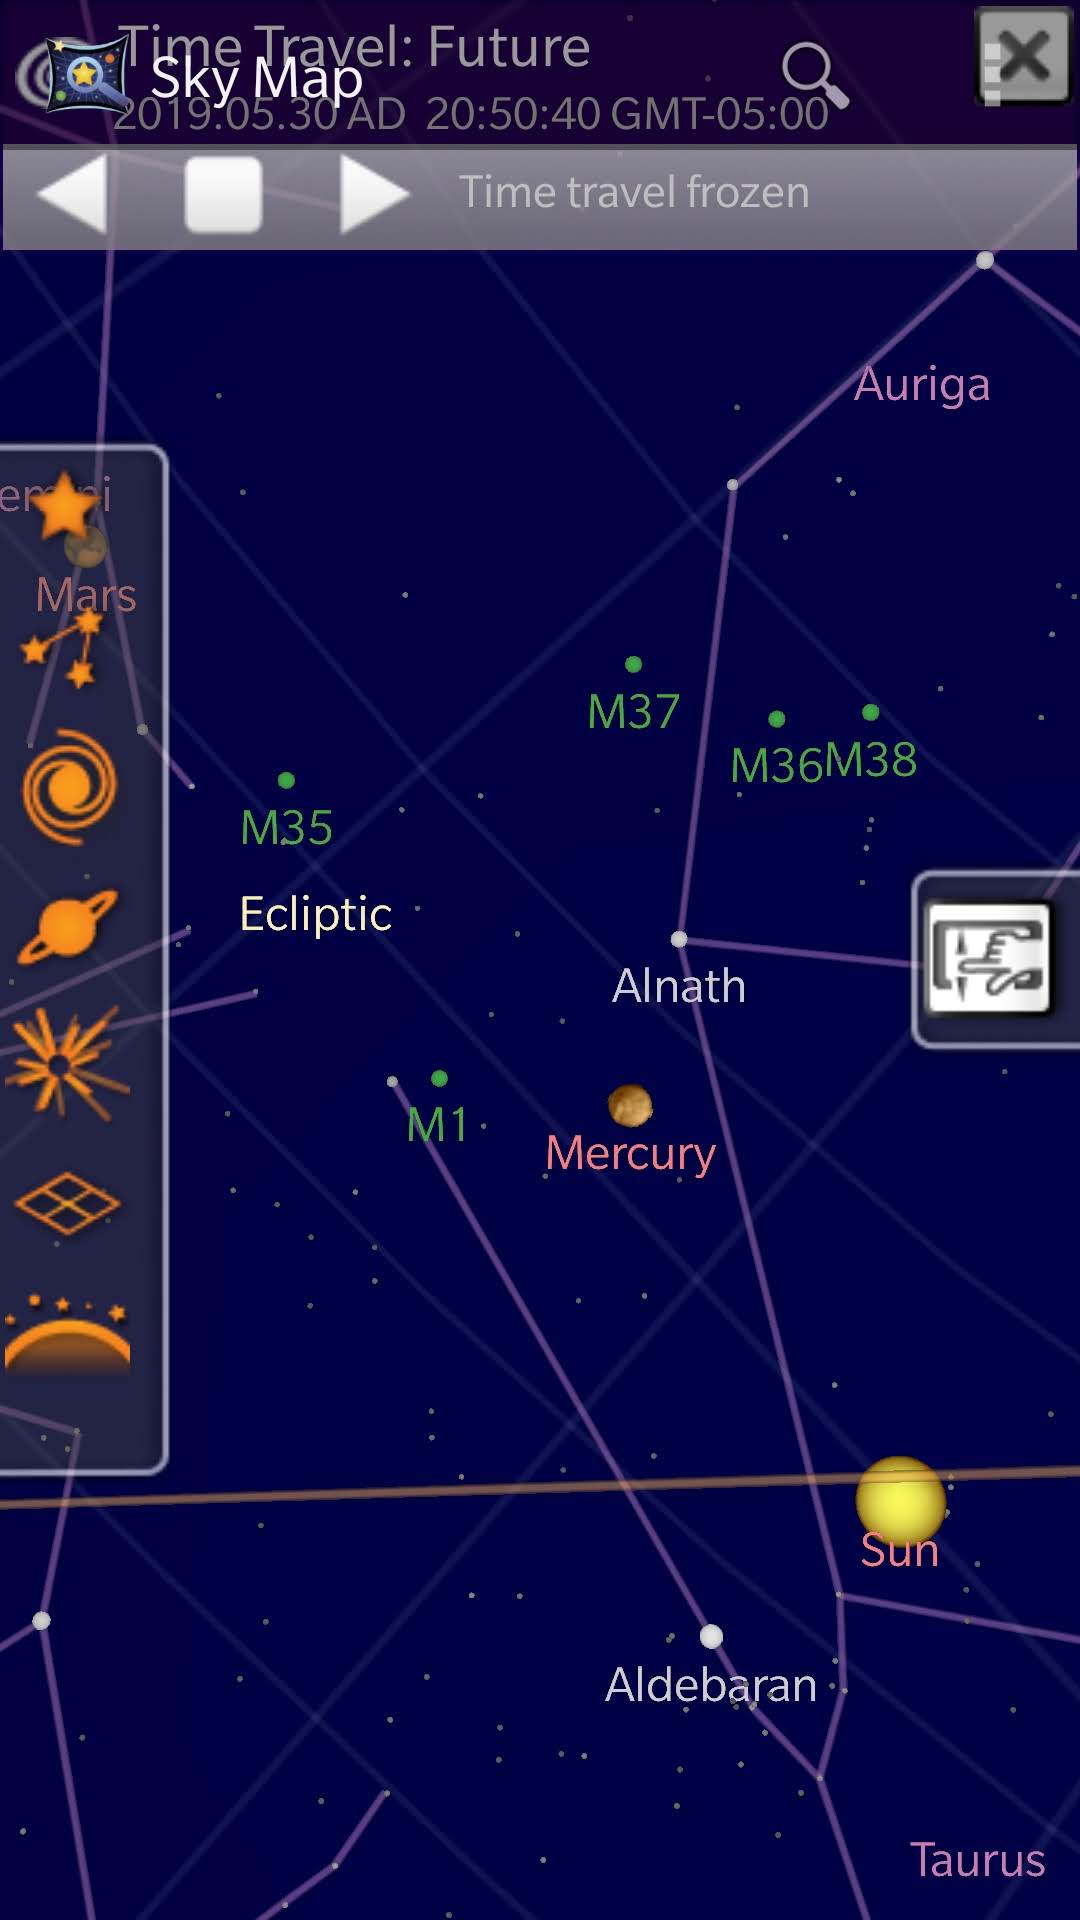
One of the challenges when learning astronomy is identifying stars, constellations, planets in the sky. This is where a planetarium application steps in the help. With the gyroscopes built into all modern smartphones, the device knows which direction it is pointing in as you move around. This allows you to hold up the phone pointing at a nightsky and have the planetarium application display a chart of what you are pointing at. There are several applications available which offer this capability, with Google Skymap being a no frills, but effective, free option. If willing to pay for a planetarium app, then the well known Stellarium desktop app is also available as a paid for option.
Sunrise Sunset (Free with ads)
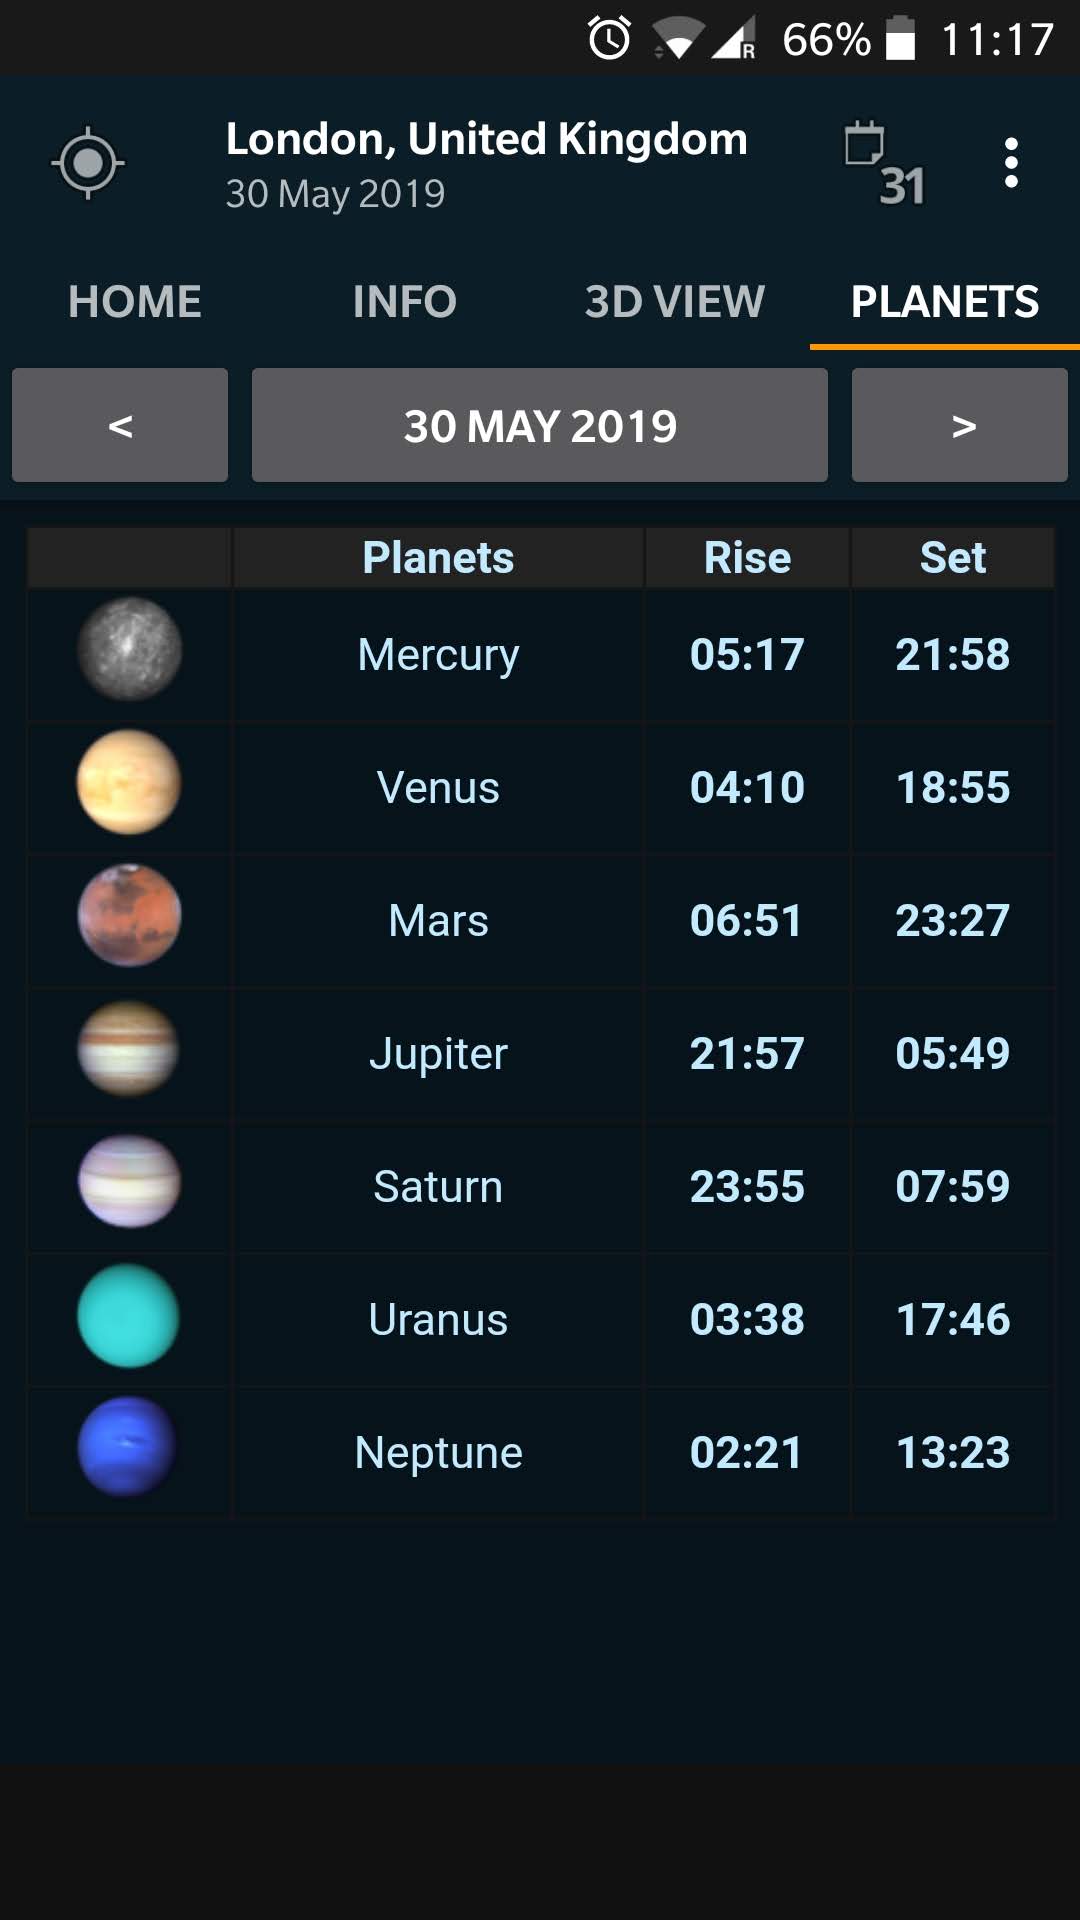
It can’t escape anyone’s attention that the Sun and Moon rise and set at a different time every day. The same is true for all the planets in the solar system that astronomers might want to view. It is thus useful to have a quick reference for when the rise and set times are for all the main bodies in the solar system. This provides details on the different stages of sunrise/sunset, and the rise and set times of each planet in a quick to access manner. A slight annoyance is that the app sometimes gets stuck and displays a blank page.
Eclipse 2.0 (Free with ads)
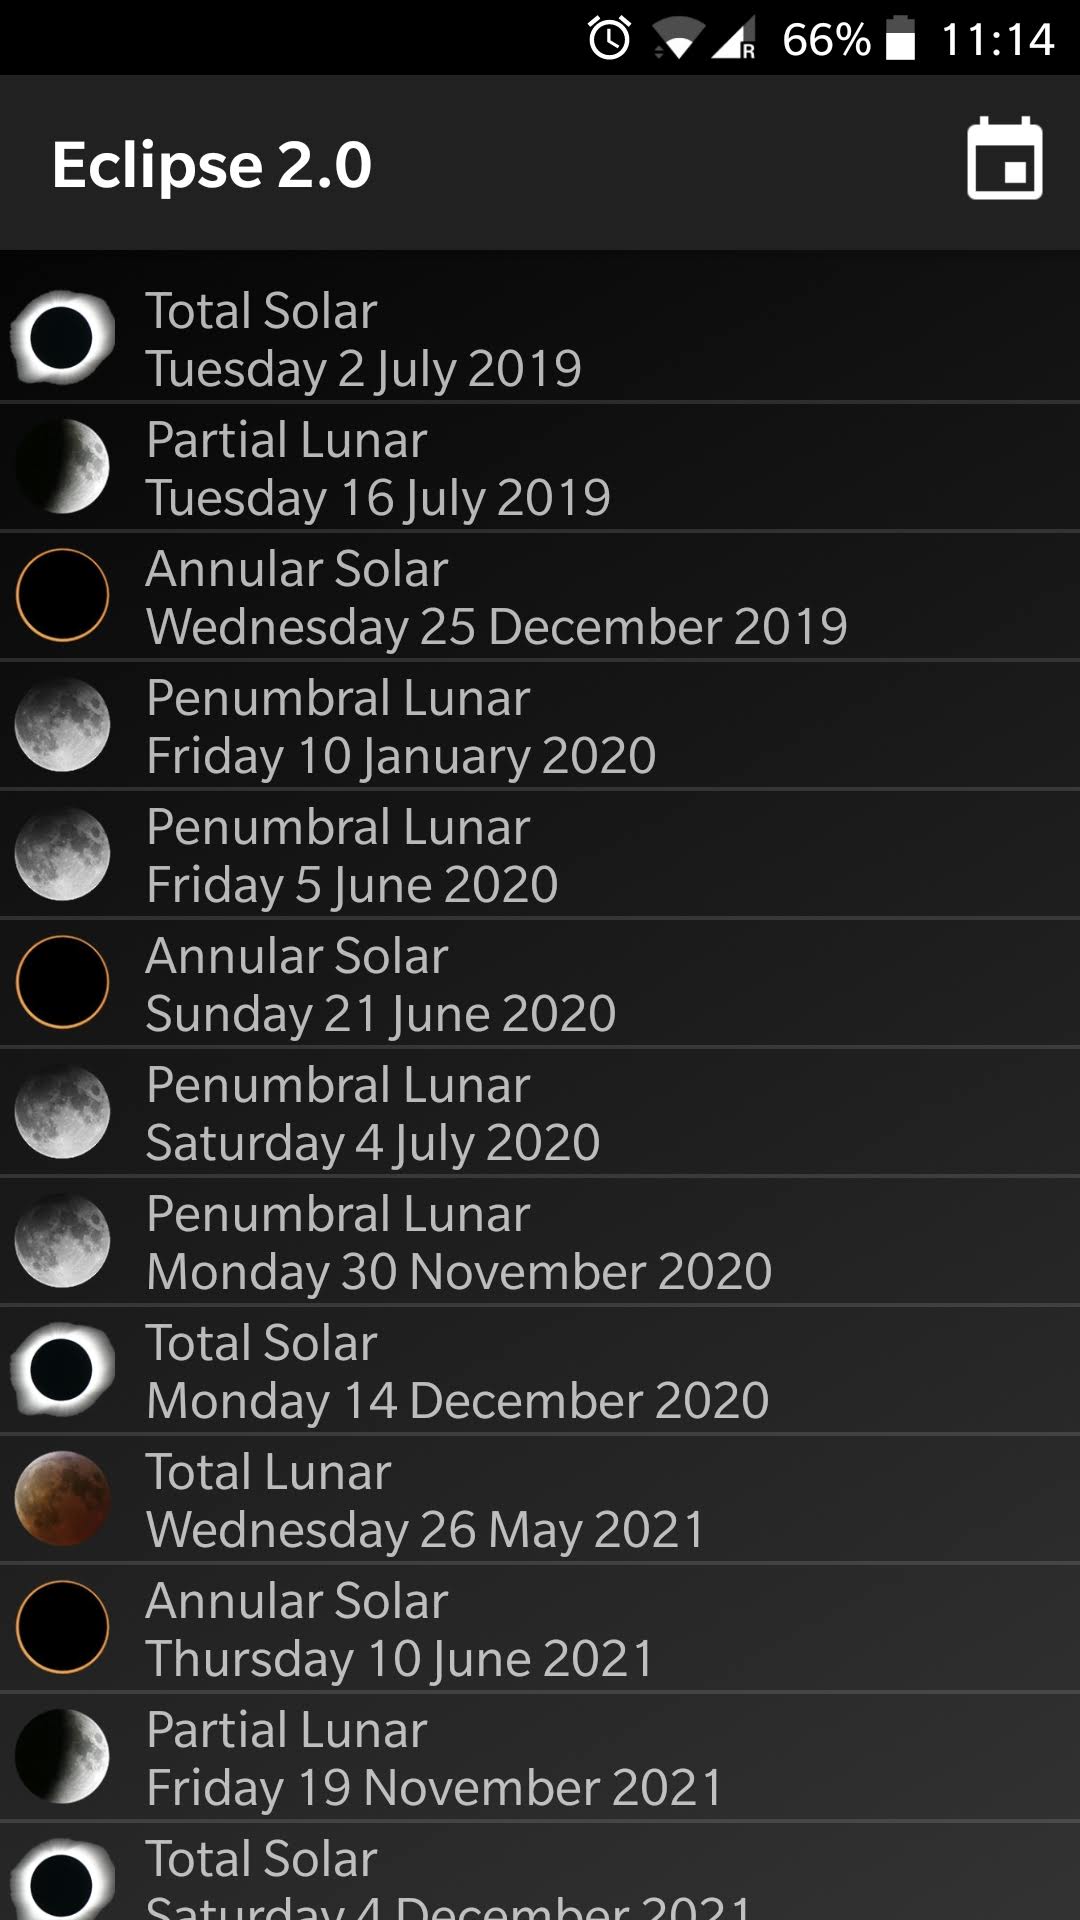
Eclipses, whether solar or lunar, are relatively rare events. A total solar eclipse happens a couple of times a year somewhere on the planet, but any given spot may have to wait decades between events. Lunar eclipses are a bit more frequent, but it might be a year or more between total lunar eclipses. This application will display a list of all future events (for a 100 years hence), and can optionally filter them based on the viewing location.
Solar Eclipse Timer (Paid per eclipse event)
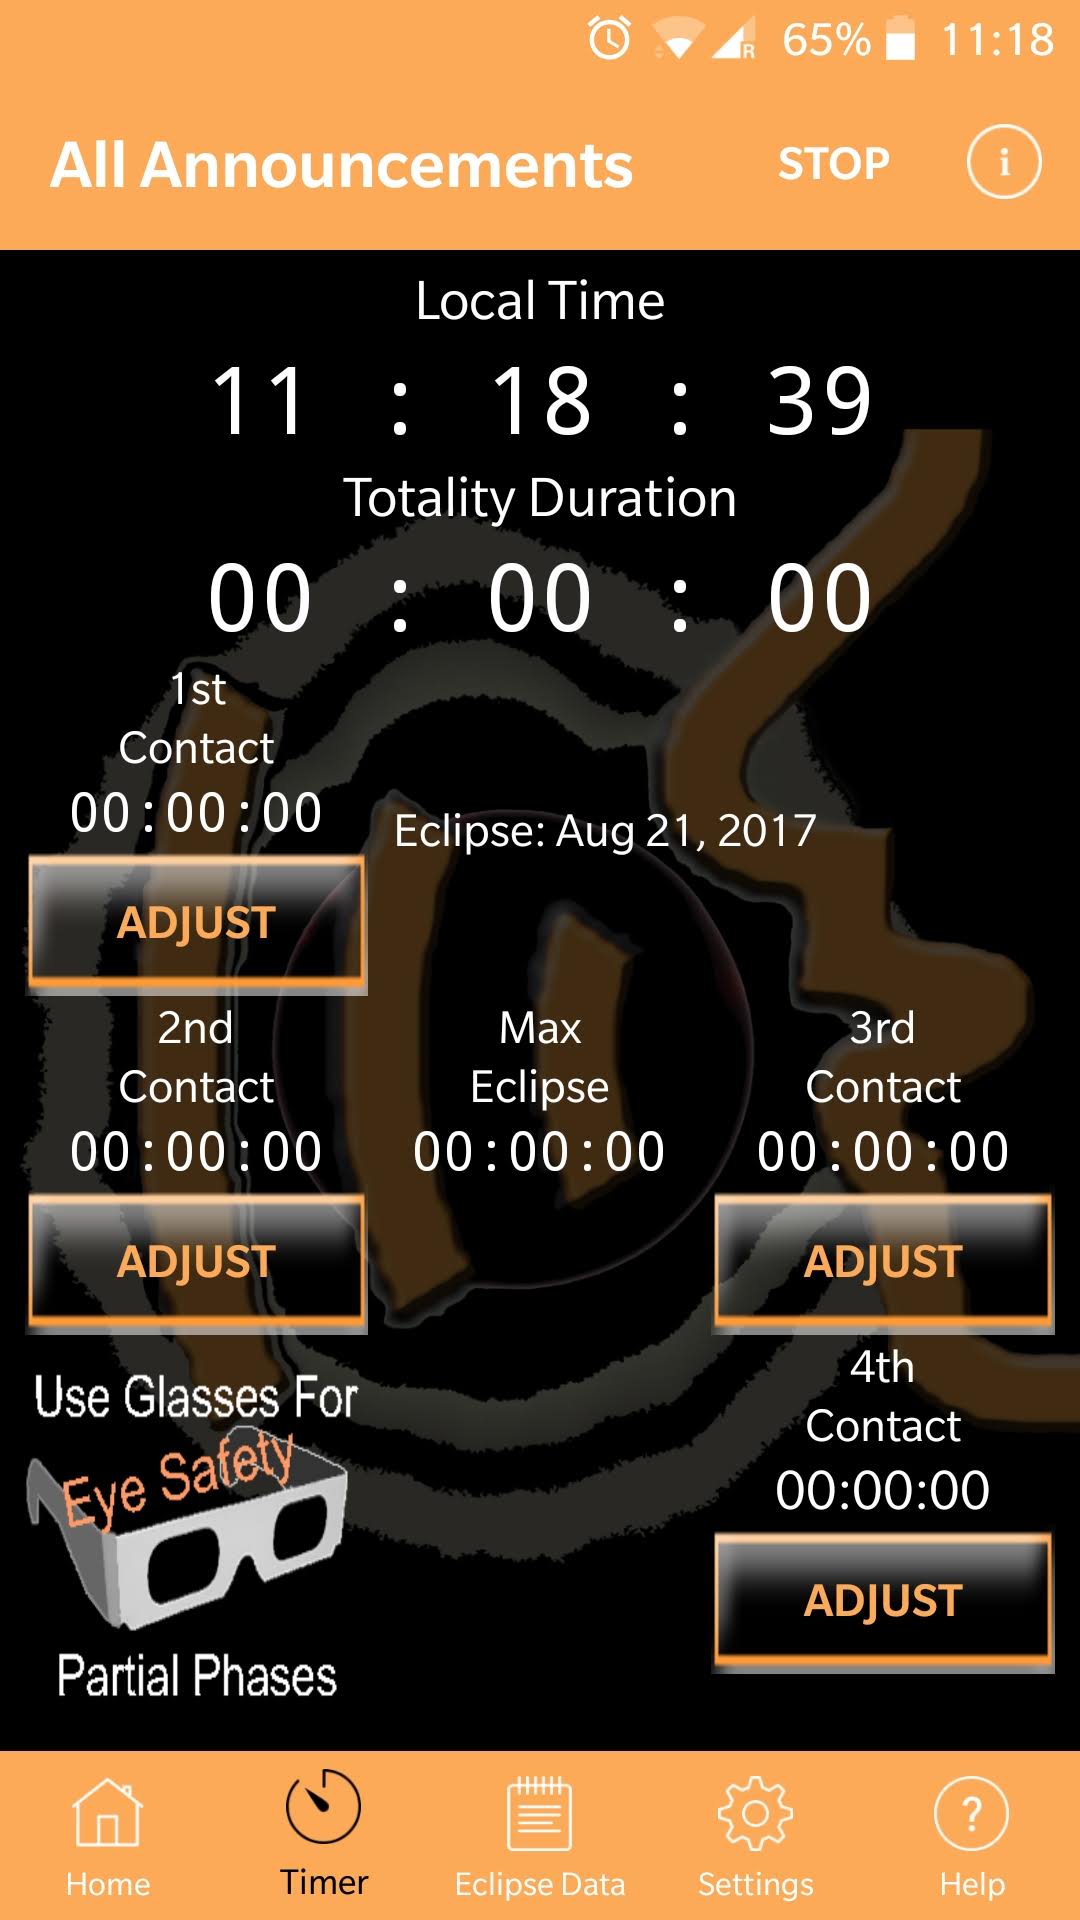
When travelling to view of photograph a total solar eclipse, it is critical to know exact timings for the start and end of the eclipse, as well as the start & end of totality. These times vary depending on your precise physical location so an app is needed to provide localized timings. You don’t want to be fiddling with the phone at these times, so this app provides useful spoken audio alerts to each phase of the eclipse, allowing you to focus on more important things.
Clear Outside (Free)
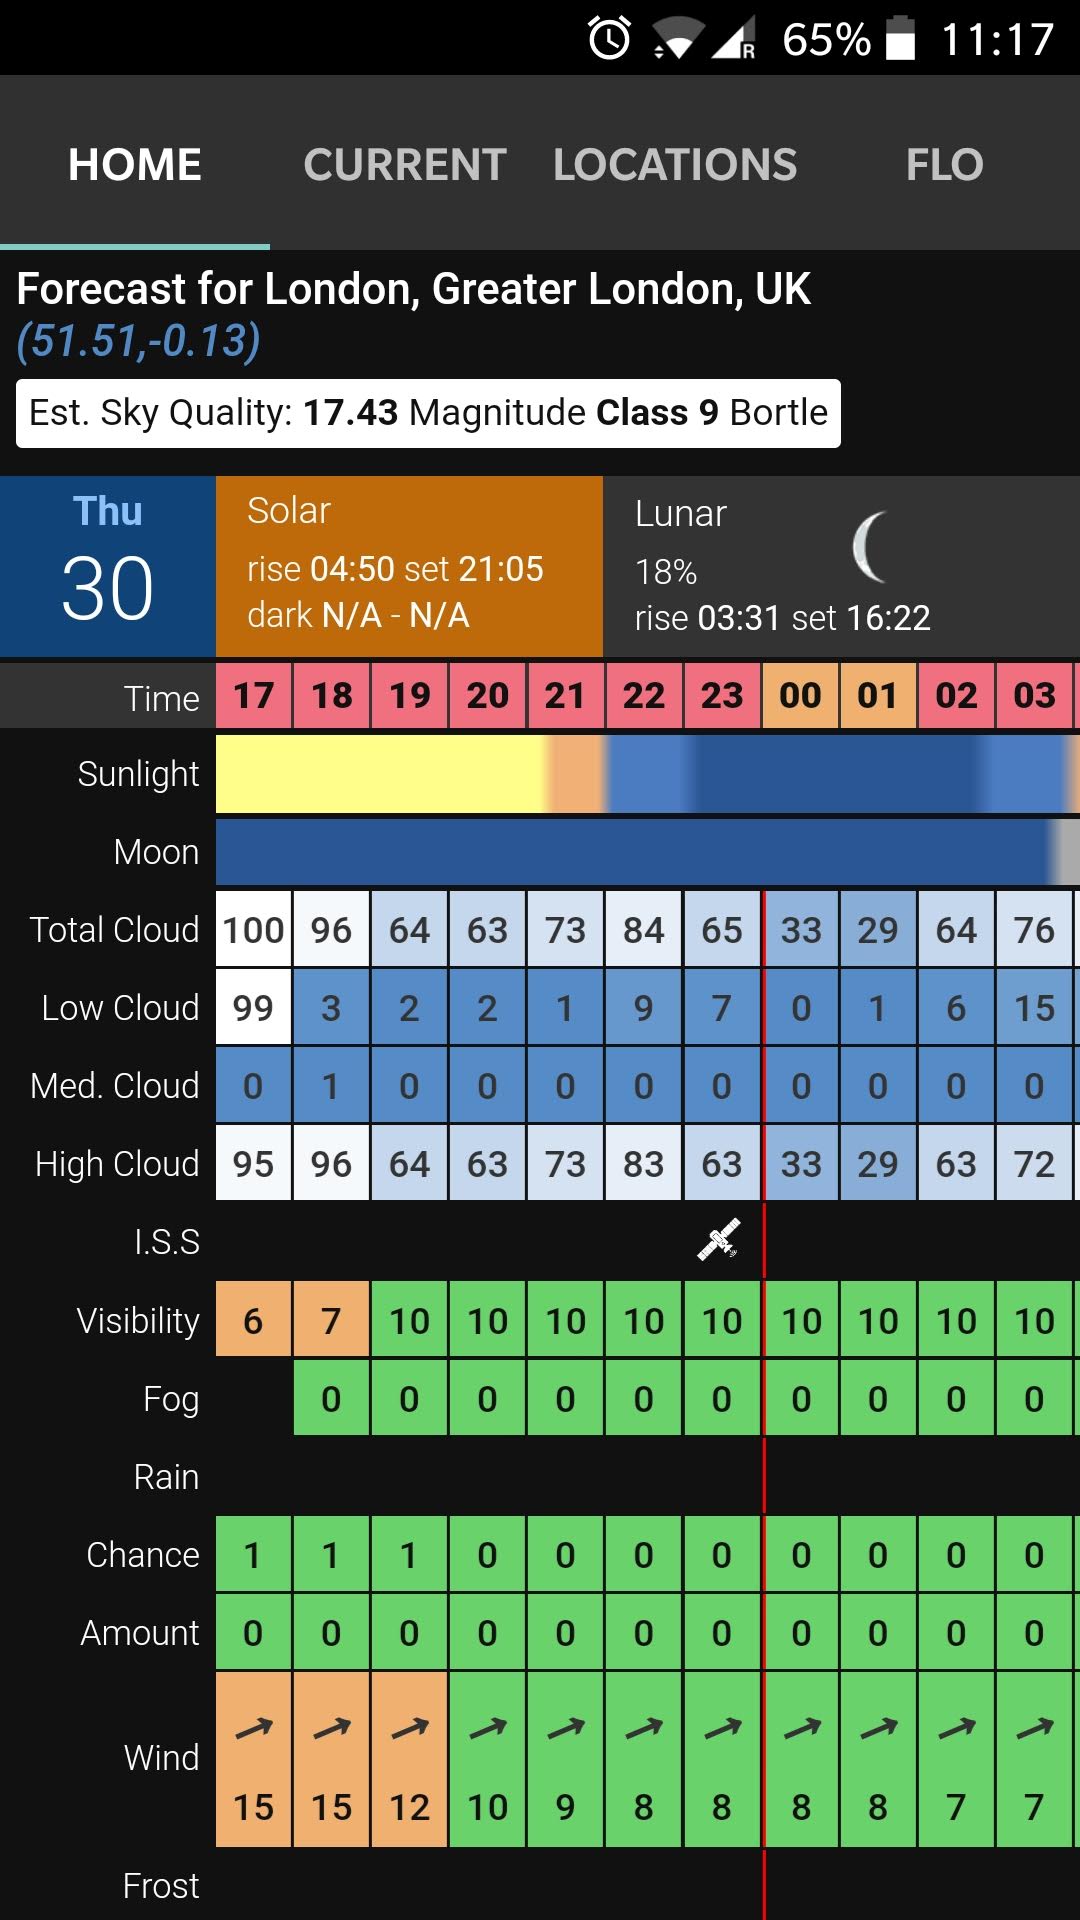
For visual observers and astrophotographers, many an observing session will be ruined by poor weather conditions. This is particularly frustrating when certain events (eclipses, planetary conjunctions, comets) are only visible at very specific days and times. It is thus vital to both understand the current weather conditions and get predictions for forthcoming nights. There are a great many weather applications available, but general purpose forecasts don’t usually provide the level of detailed desired by astronomers. This application is designed specifically for astronomers, showing many fine details otherwise not available. It includes percentage cloud cover at three levels in the atmosphere, rain predictions, general visibility, wind speeds and more. It also details lunar phases since illumination from the moon can be as bad as city light pollution in drowning out fainter targets.
GPS Status (Free)

When calibrating / aligning telescope mounts it is often useful to know about the observing location’s longititude and latitude, as well as which direction is north. Phones all have builtin gyroscopes which can provide direction information, and GPS receivers to provide the location. The GPS status application presents this data in an easily accessible format and also provides the ability to recalibrate the internal compass which is worth doing periodically as some phones quite easily loose calibration.
ISS Detector (Free with ads, or paid without ads)
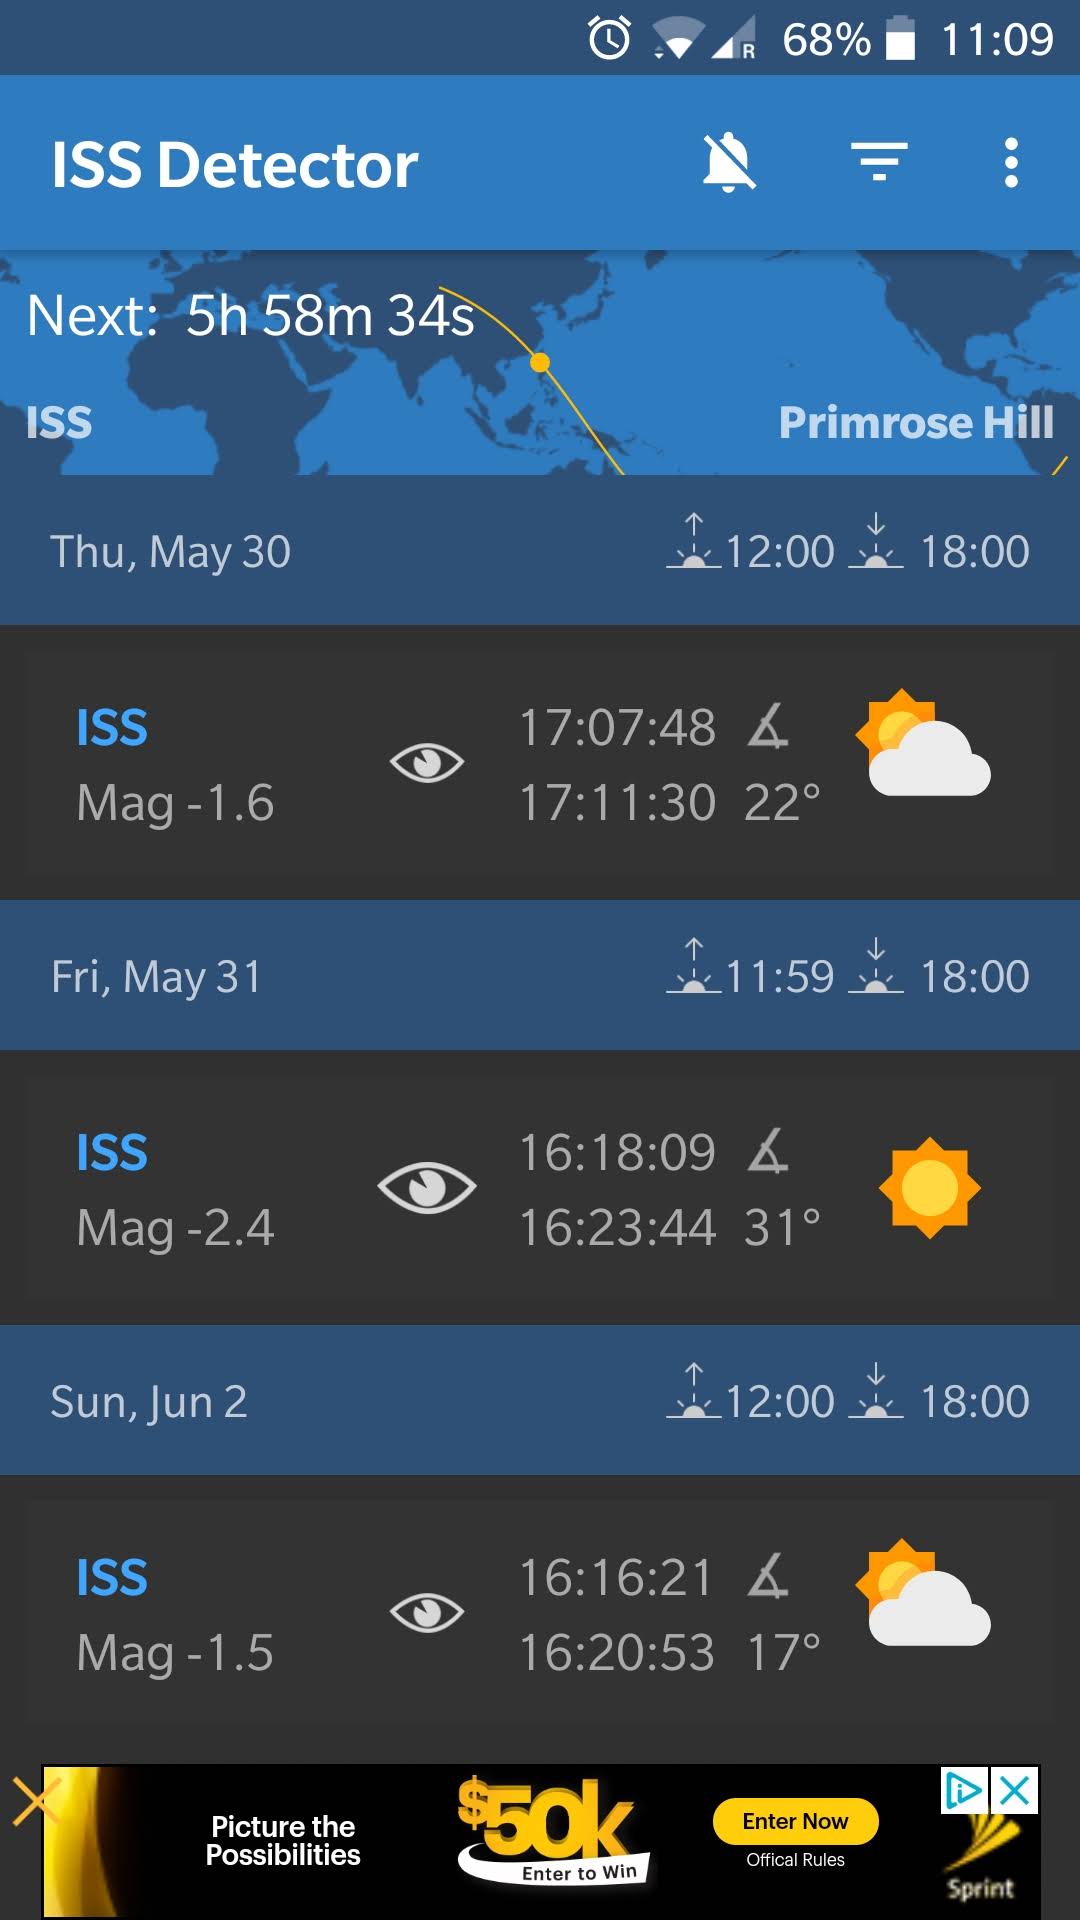
An event that always gets attention from attendees, particularly from first timers, at BSIA events is a flyover of the International Space Station. The ISS makes an orbit of the Earth approximately every 92 minutes, but it will follow a different track each time affecting where it appears in the sky, when viewed from a fixed point. The time relative to sunrise or sunset also affects how long it is visible for and its brightness magnitude. The “ISS Detector” application crunches the numbers and presents information on when passes are visible from the current observing location for the next 7 days or so. It will illustrate the path it will take across the sky with start/end times and magnitudes. It can be made to trigger a phone alert shortly before the flyover takes place to minimize the chance of accidentally forgetting when it happens. Despite the name it can provide track info for other objects besides the ISS.
ISS Transit (Free)
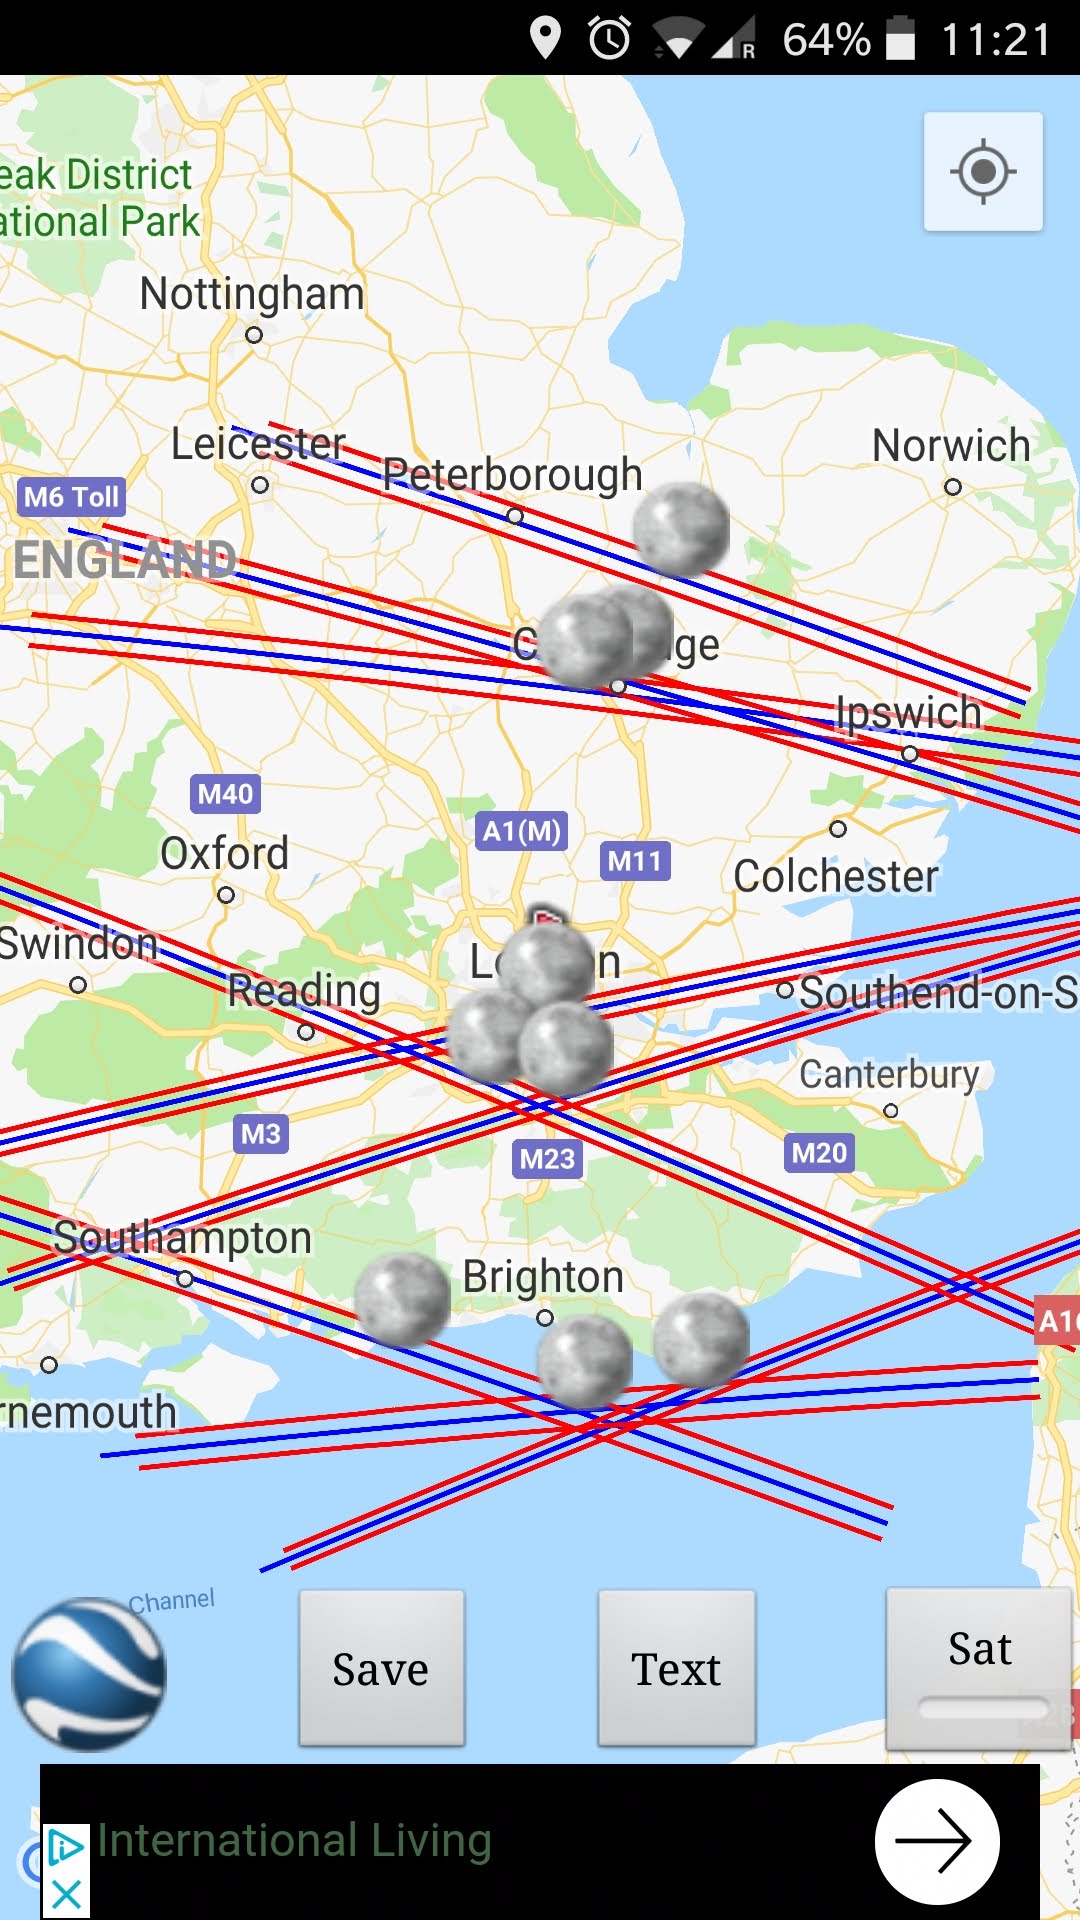
Some of the more interesting events for astrophotographers focusing on solar system objects are conjunctions and occultations. Flying in low earth orbit, the ISS has quite frequent alignments with other solar system objects, especially the moon and sun. These events are interesting to photograph allowing the ISS to be seen in silhouette against the Sun, or brightly illuminated against the Moon. Whether these events are visible is highly dependant on the exact viewing position on the ground and thus require advance planning and travel to quite specific sites. This application is able to perform calculations to show where forthcoming interesting transits are taking place.
Heavens Above (Free with ads)
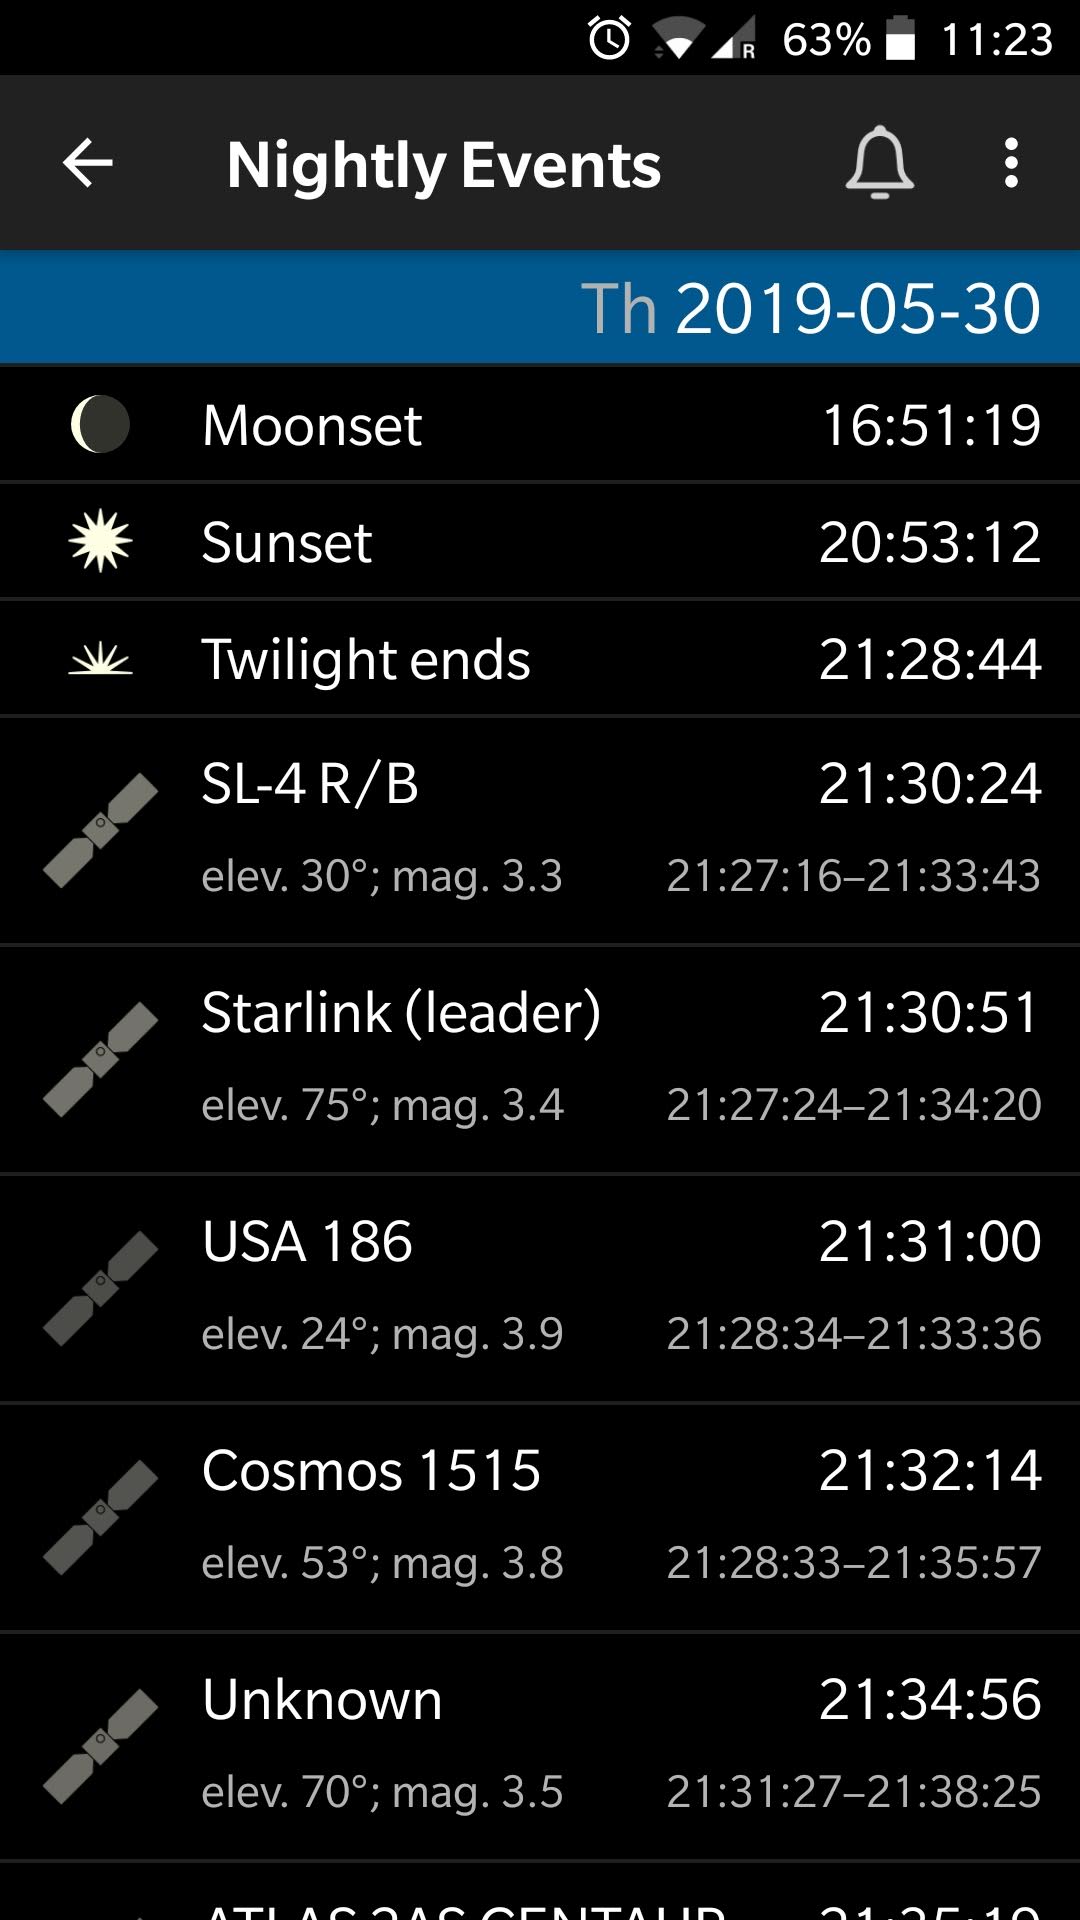
The earlier mentioned ISS detector application focuses on fly overs of the ISS. There are many more satellites in orbit around the Earth that while often not visible to the naked eye, can appear in photographs either intentionally or unintentionally. This application provides information on all the satellites that are likely to be overhead for any given night.
Dark Sky Map (Free)
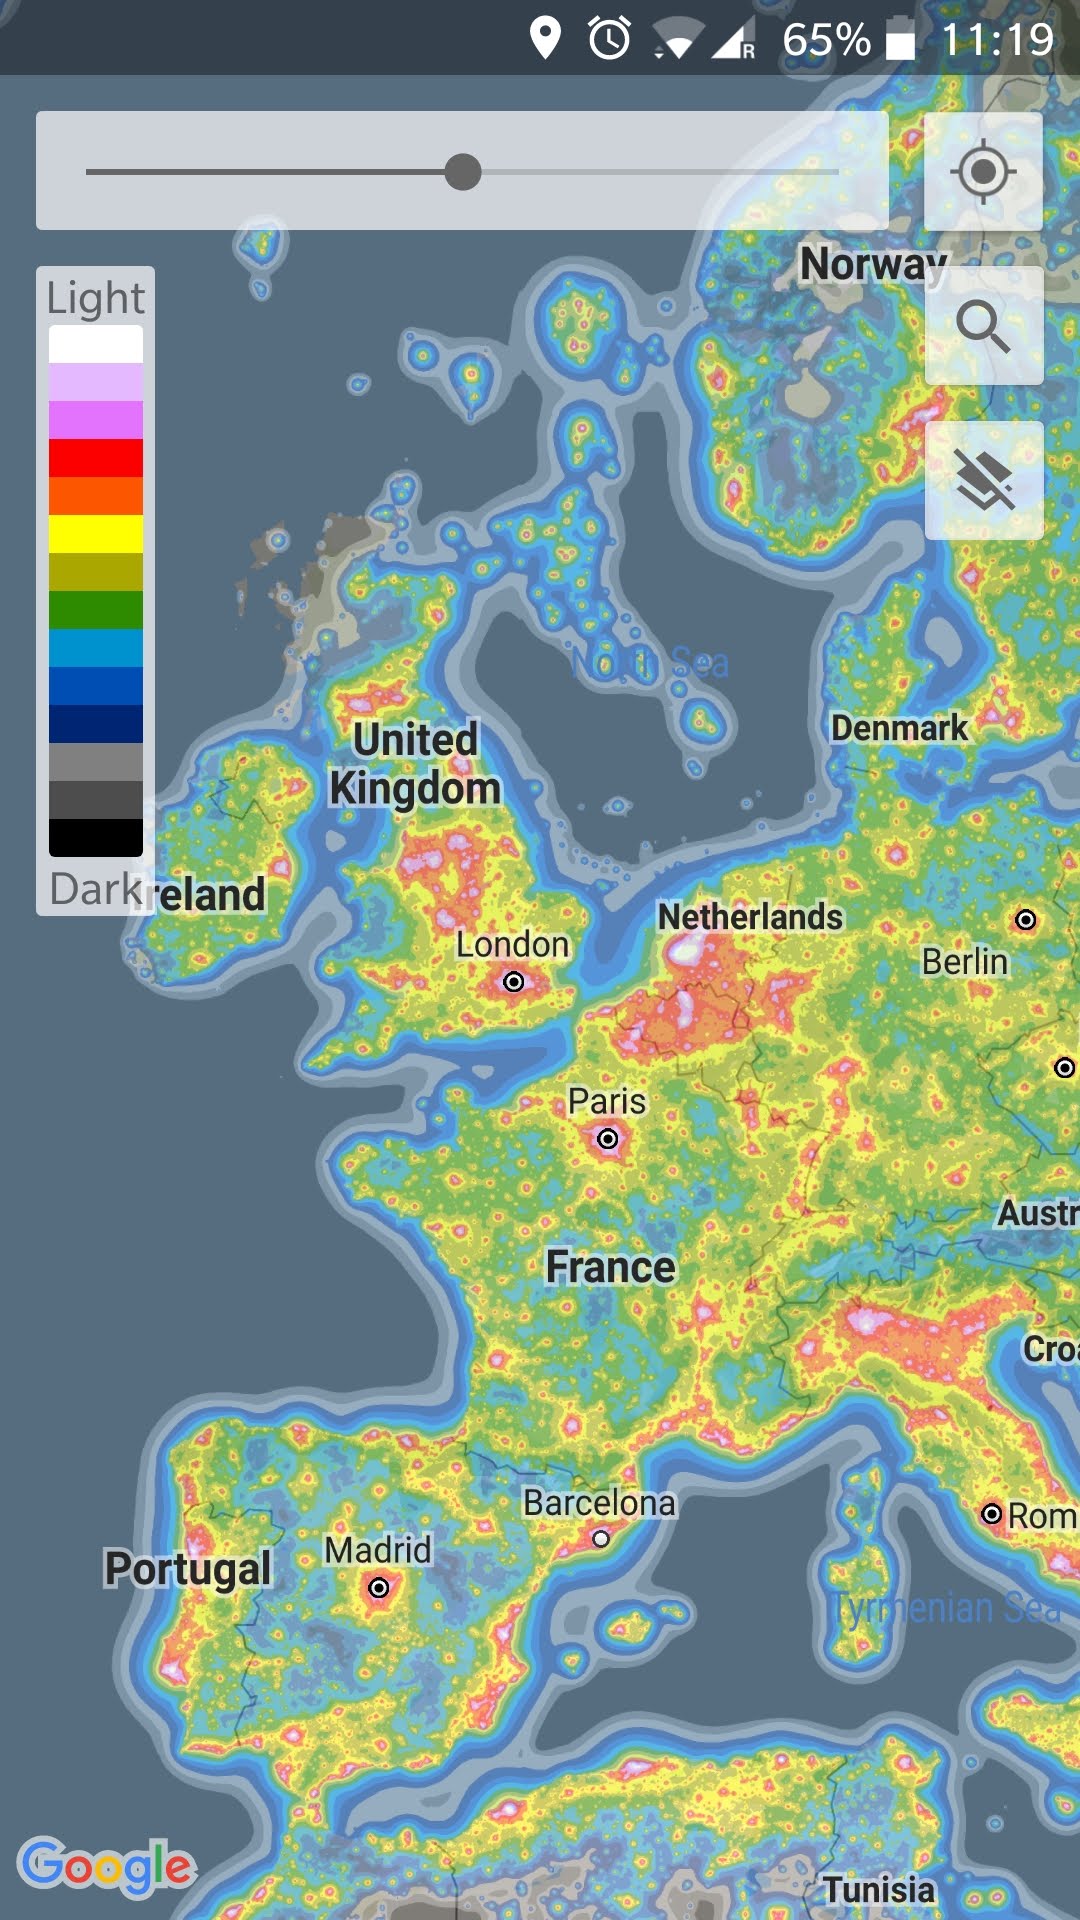
With an ever increasing portion of the population living in towns and cities, light pollution is a big problem to deal with. Even though the switch to LED lighting can have the potential to reduce light pollution by having strictly downwards facing illumination, in practice there’s been light obvious benefit as the lights are often brighter. Whether deciding on where is best to live, or planning day excursions or extended holidays, it is useful to understand the extent of light pollution across the country / world. The dark sky map provides this information in an easily understandable format overlaying a map with colour coded bands for light pollution.
Aurora Watch (Free, no ads)
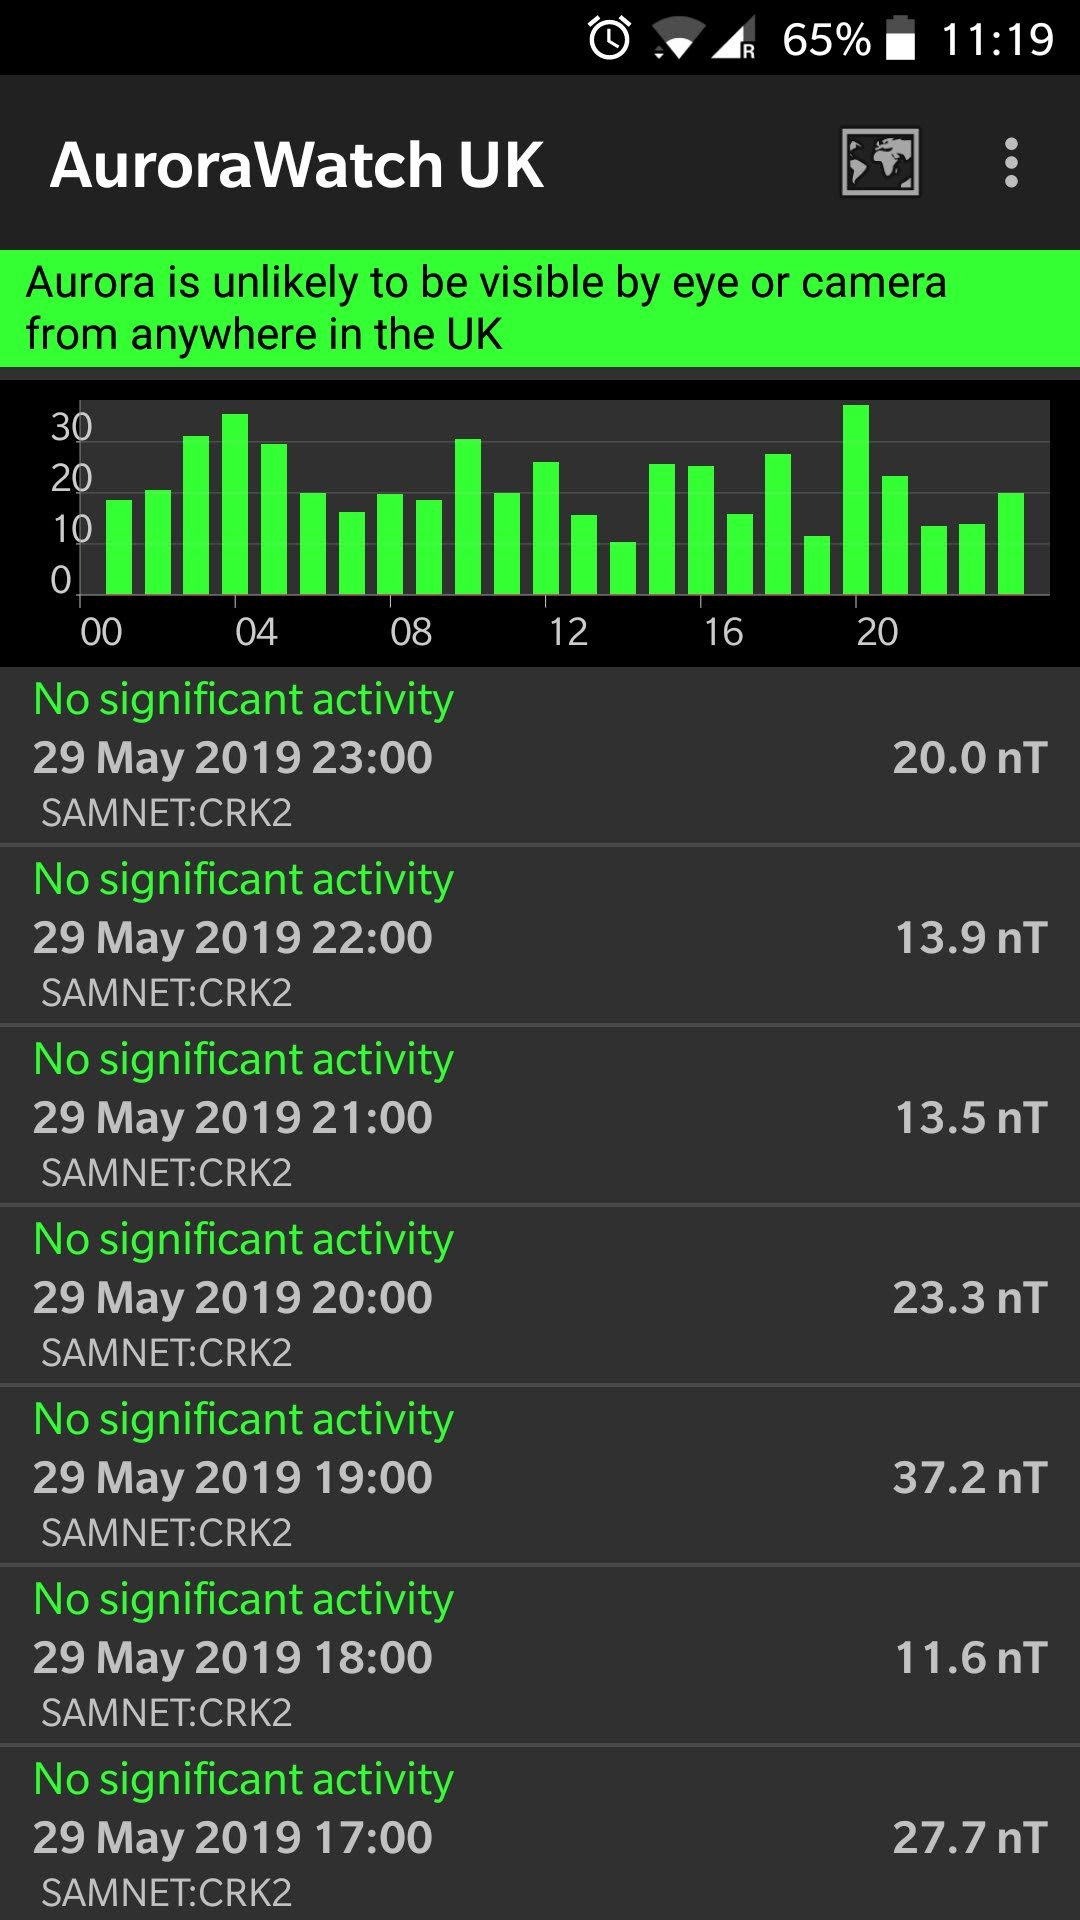
Aurora, often known as “Northern Lights” form when energetic particles from the Sun interact with the Earth’s atmosphere and magnetic field. As the name suggests, they occur more frequently the further north you or (or further south in the Southern hemisphere). There is a high correlation between the flux of particles received from the Sun and the visibility of Aurora. The application provides aurora visibility forecasts for the days ahead and active alerts when high thresholds are exceeded.
Polaris View (Free, no ads)
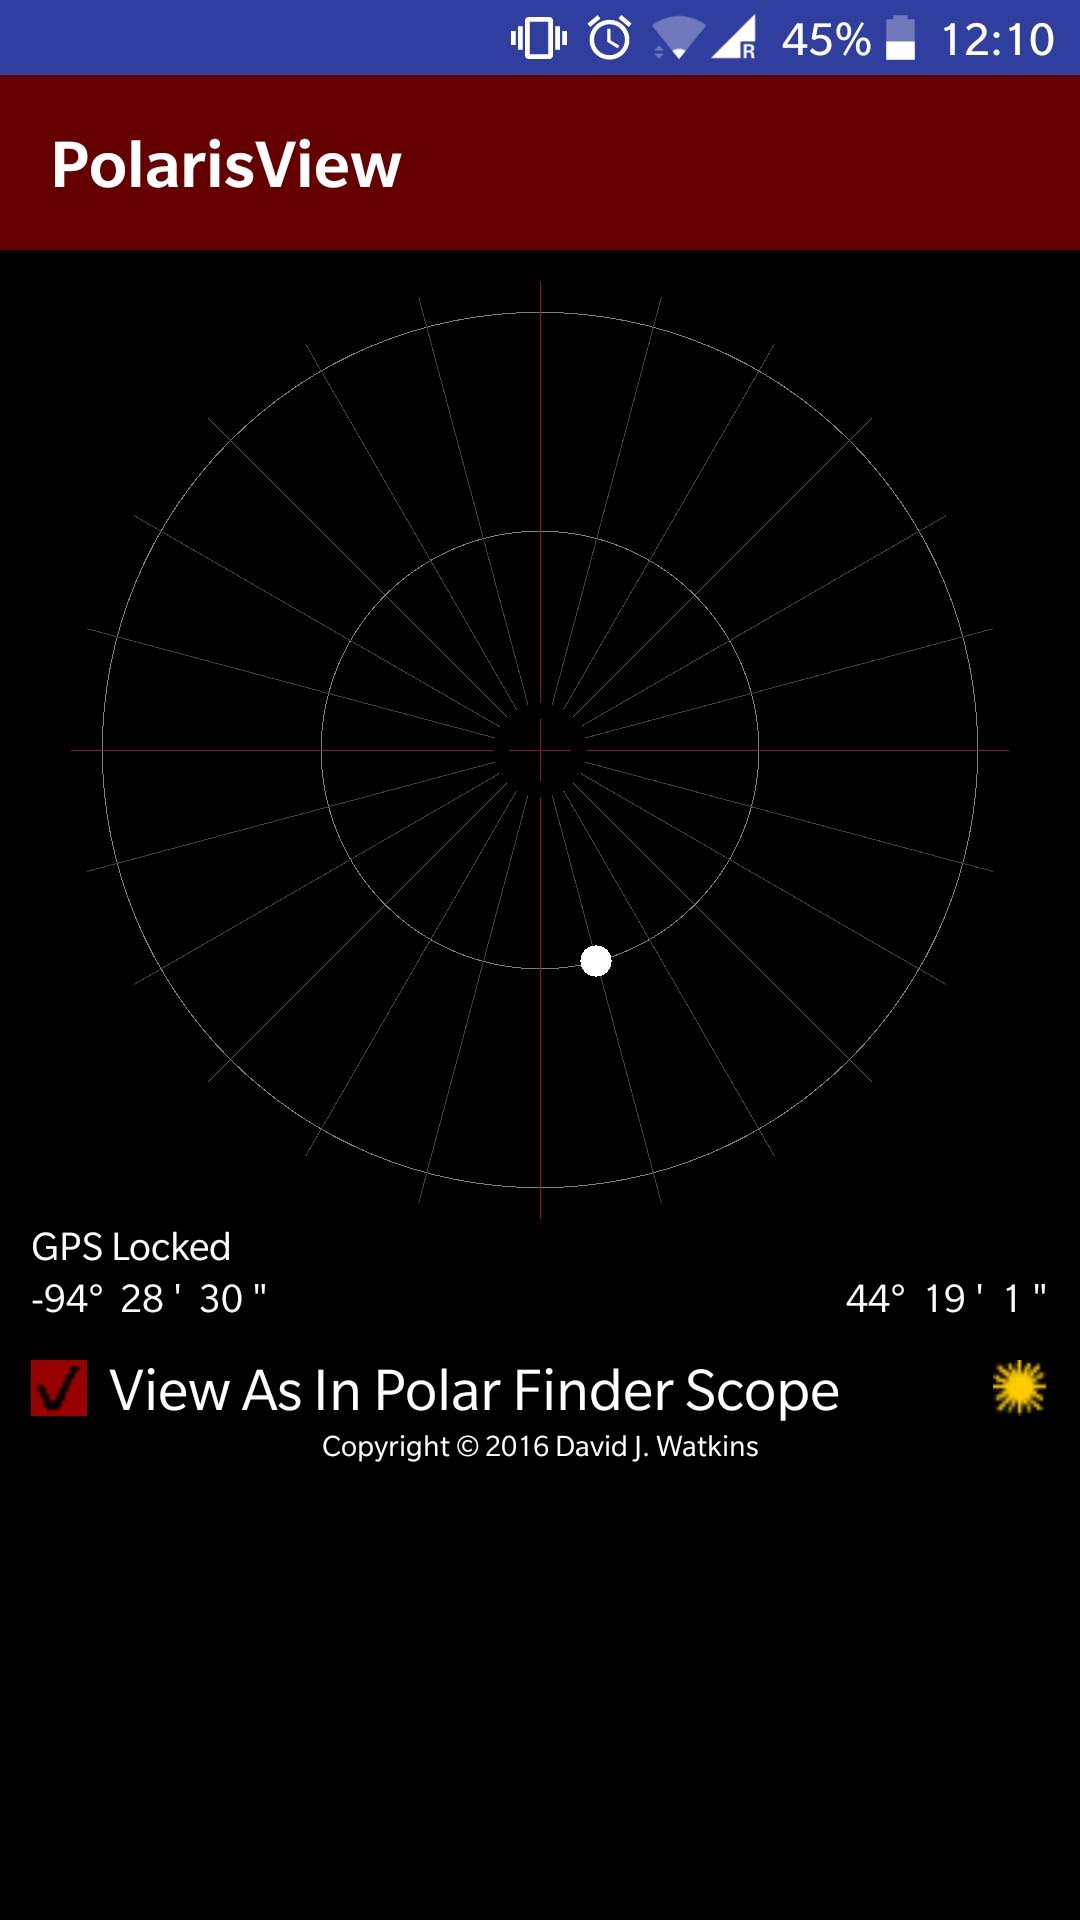
When setting up an equatorial tracking mount care needs to be taken to accurately align the mount with the North Star, Polaris. It is not as simple as just putting Polaris in the dead center, as it is not quite at true north in the sky. Instead it needs to be offset by a small amount. The direction in which it is offset depends on the time of day / night, and the amount of the offset varies from year to year as the Earth wobbles on its axis. Mounts will typically have a polar scope / sight to facilitate this alignment process, but may require knowledge of the direction in which Polaris should be offset. The application provides a simple view of the sky simulating what it should look like through a polar scope. The astronomer simply needs to align their scope so that the position of Polaris matches that shown in the app.
Night Shift (Free, no ads)
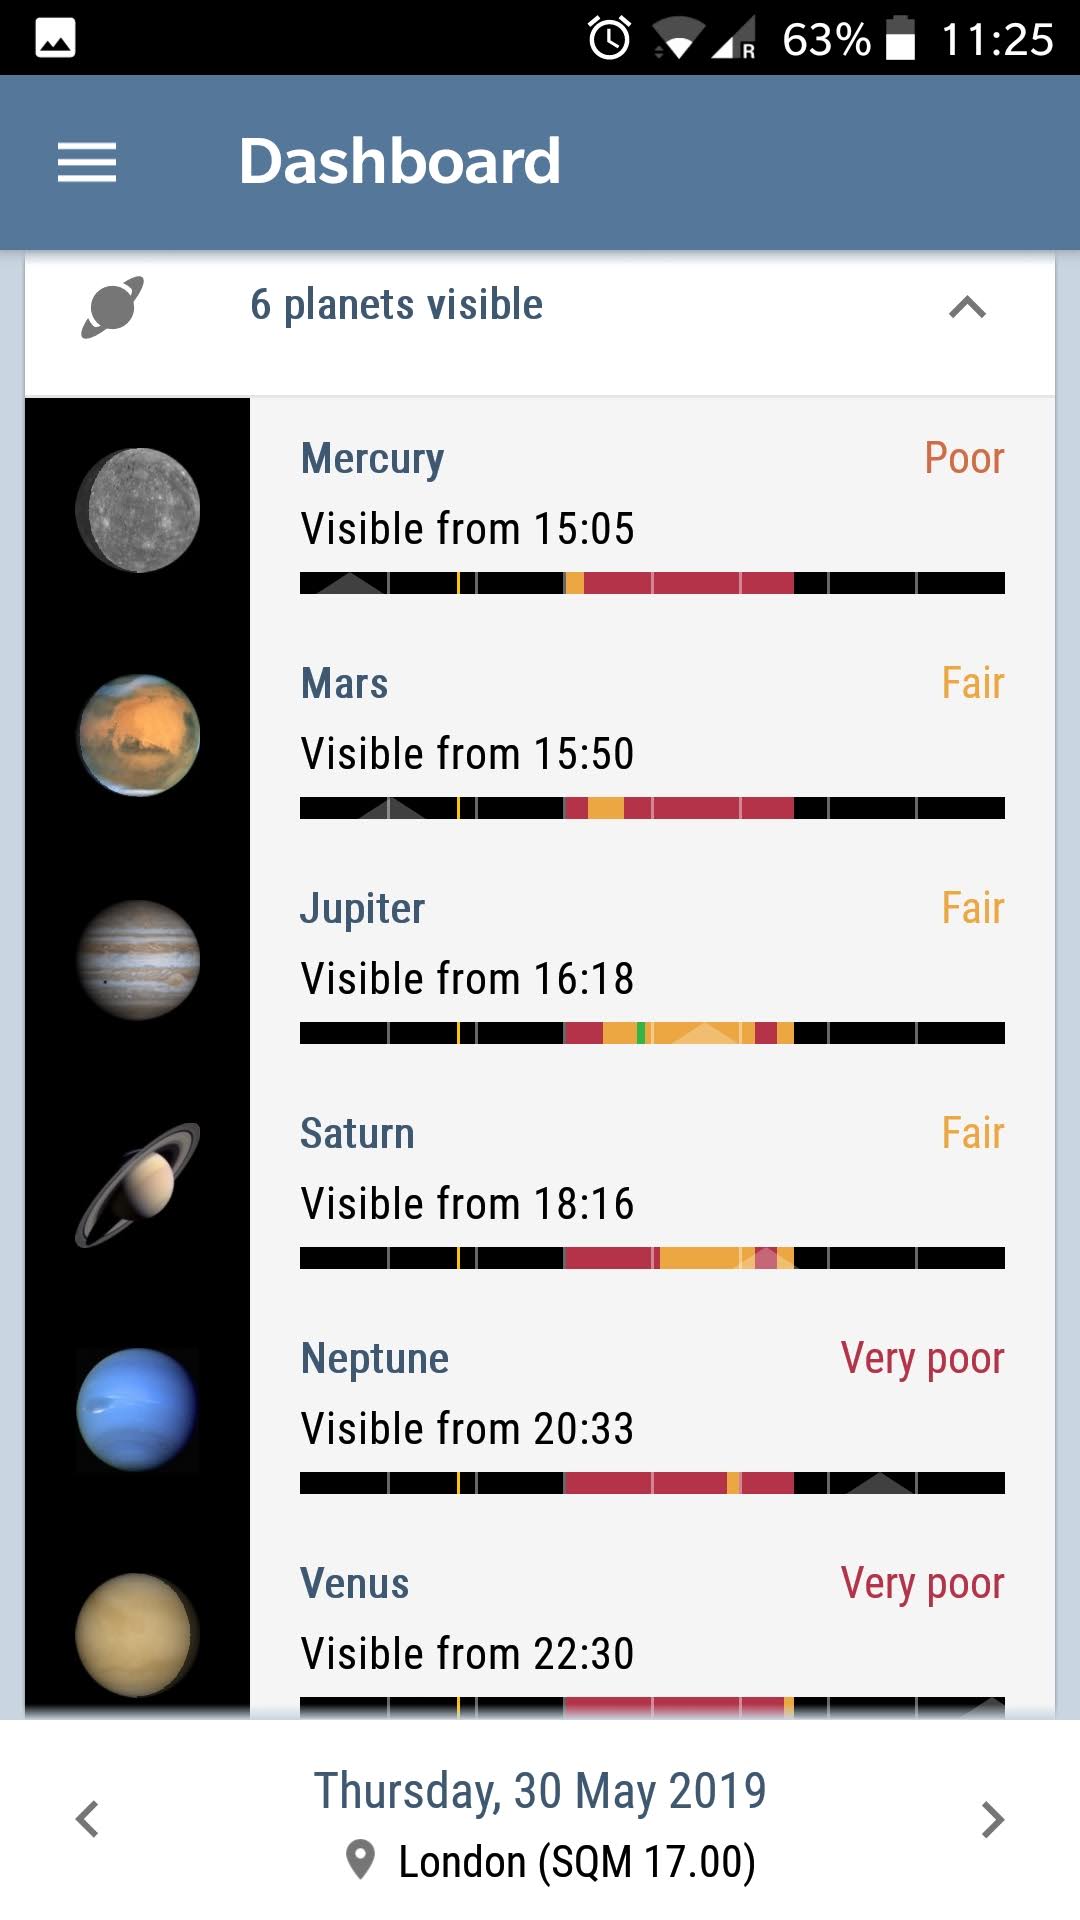
This application is a new & promising discovery, aiming to provide a summary of everything that is interesting in the night sky for any given night. It displays visibility of all the solar system planets and the Moon. The viewer can enter information about their telescopes and viewing location and it can then highlight which other constellations, nebula, and deep sky objects are likely to be possible to view. It effectively combines functions of many of the previously discussed applications into one convenient dashboard.
Sun Position Map (Free, no ads)
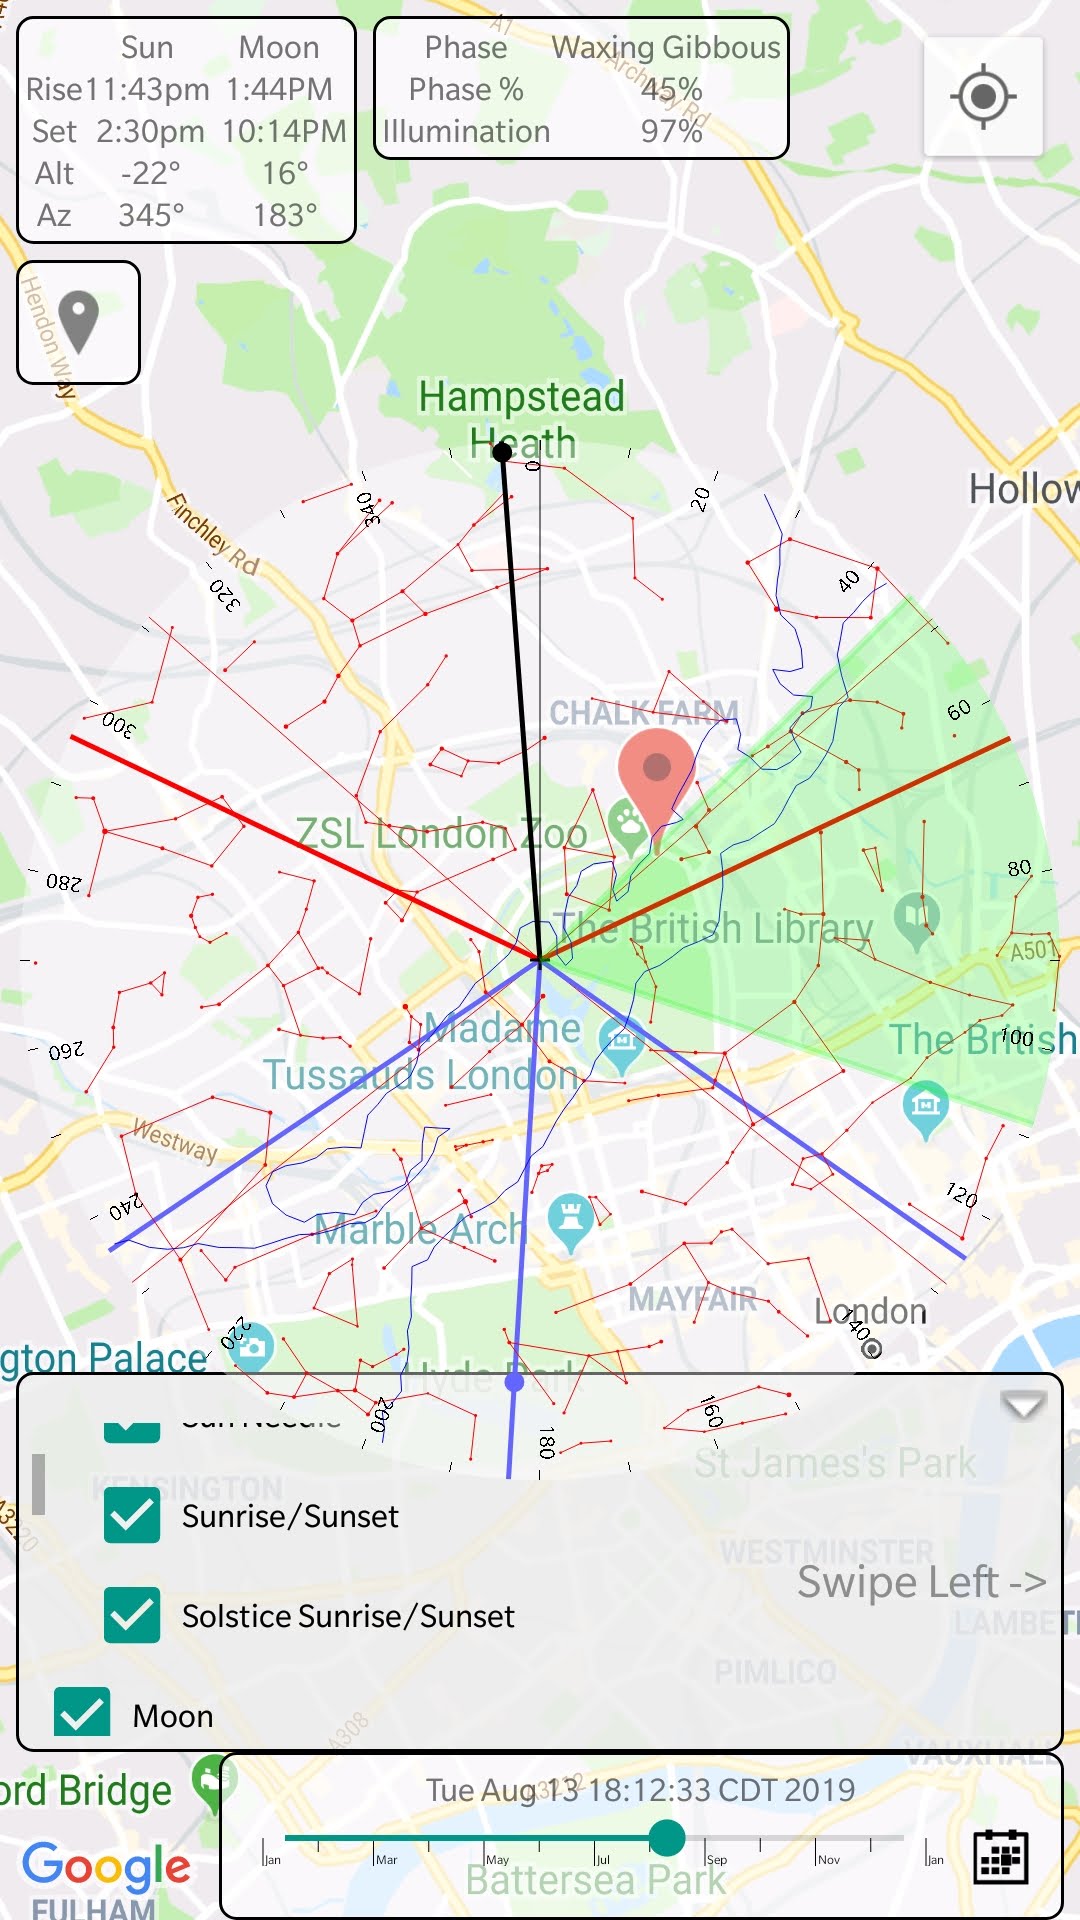
When planning photographic shots featuring the sun or moon in combination with foreground objects, it can be useful to understand exactly where the sun will be in relation to the foreground. This application provides an overlay for Google maps, showing the path of the sun from rise to set. Just find the object to be photographed on the map, and the app will show where the sun will be in relation to it. It can also overlay a field of view indicator for various camera lens focal lengths.