The project background
This post is talking about my involvement in the Obsolete & Discontinued project which has just had its first exhibition at the Releva-T analogue photography festival in Spain. The seeds of the project were sown back in March 2015, when London based photographer & expert printer, Mike Crawford, was given a huge quantity of photographic paper (and a few rolls of film) by a client, David Yates. The paper had come from darkroom supplies left by David’s late uncle, Bret Sampson. There was quite a variety of paper, including Agfa Record Rapid, Kodak Bromesko, Agfa Brovira, Kodak Royal, Kentmere Bromide, Ilford Ilfomar and more besides. Most of the paper was so old – at least 20 years, perhaps as much as 40 years for some – that common opinion would suggest it to be mostly worthless and fit only for the rubbish. Thankfully Milke did some test prints to investigate the condition of the paper, finding some in fine condition, while others had heavy fog. Even those which had heavy fog turned out to be quite amenable to lith developer which was not nearly as badly affected.
After seeing these results, Mike unveiled a proposal to a meeting of the London Alternative Photography Collective (LAPC) meeting. He intended to give out batches of paper (~10-20 sheets per person depending on number of participants) to a group of photographic artists with an open brief to produce any type of work they wished. The only rule was for the supplied paper to be used in some manner, whether for the final work or just in an intermediate step. The idea was immediately appealing and many attendees of that meeting signed up to participate in the project straight away, myself included. After getting around 60 people signed up Mike sent out details on what paper was available (and its response with test prints) to all participants asking them to provide a preference list.
Developing the techniques & idea
At the time, having a 3 month old baby, I wasn’t really going into the darkroom at all, so using any kind of traditional black & white process was out of the question, never mind learning lith printing techniques. I decided to focus on alternative photographic printing techniques that could be done without any use of a darkroom, specifically the lumen and chemigram processes which I had recently started experimenting with in the back garden. I had trays suitable for 8×10 paper and wanted FB paper rather than RC. Beyond that I was not fussed on the choice, whether it was fogged or not, since this is pretty much irrelevant to the chemigram process which takes place in full light. Essentially any photographic paper will work for chemigrams no matter how old or badly looked after it is. Eventually I was given approx 15 sheets of Agfa Brovira G3 as the official paper to use for the project work.
Rather than risk wasting this precious paper, I bid on a couple of ebay auctions acquiring some ancient kodak and ilford papers for exploration of the techniques I wanted to use in the project. With the ilford paper I learnt how to combine the lumen and chemigram processes to create very pleasing hybrid works. Showing one of the works to some friends at another LAPC meeting, a remark was made that one of the prints (shown below) gave the impression of a river running through a city:
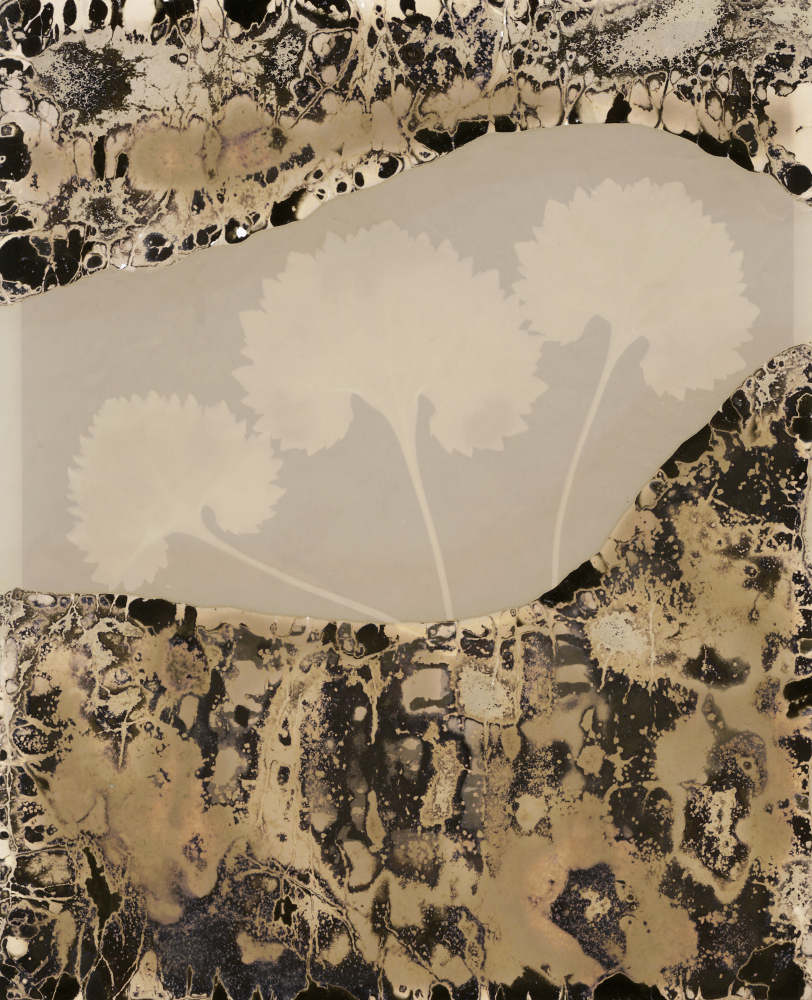
Resulting print after combining the chemigram and lumen processes.
I myself felt that the dark brown / black texture of the print felt like a desolate landscape, devastated by industrial development or some natural disaster – quite representative of the state (reckless) human development can leave land in. At the same time I was feeling that too many chemigram images I’ve seen focused on the totally abstract and so wanted to explore how to control the chemigram process to bring in more recognisable forms.
Melding these thoughts together, my intent for the Obsolete & Discontinued project was to try to produce semi-abstract, but still recognisable, images of coastal cities around the world using the chemigram and lumen processes.
Behind the scenes
The starting point was to identify some coastal cities whose border between land and sea would give rise to reasonably recognisable outline and a good balance. In other words I spent a while browsing around Google maps looking at coastlines for random cities I’ve visited in the past. This identified a number of candidates including London (Isle of Dogs), Southampton (Isle of Wight), Plymouth, New York, Boston, San Francisco, Rio de Janeiro and Tokyo. With these identified I printed out the maps on plain paper and using a scalpel cut around the coastline to remove the land
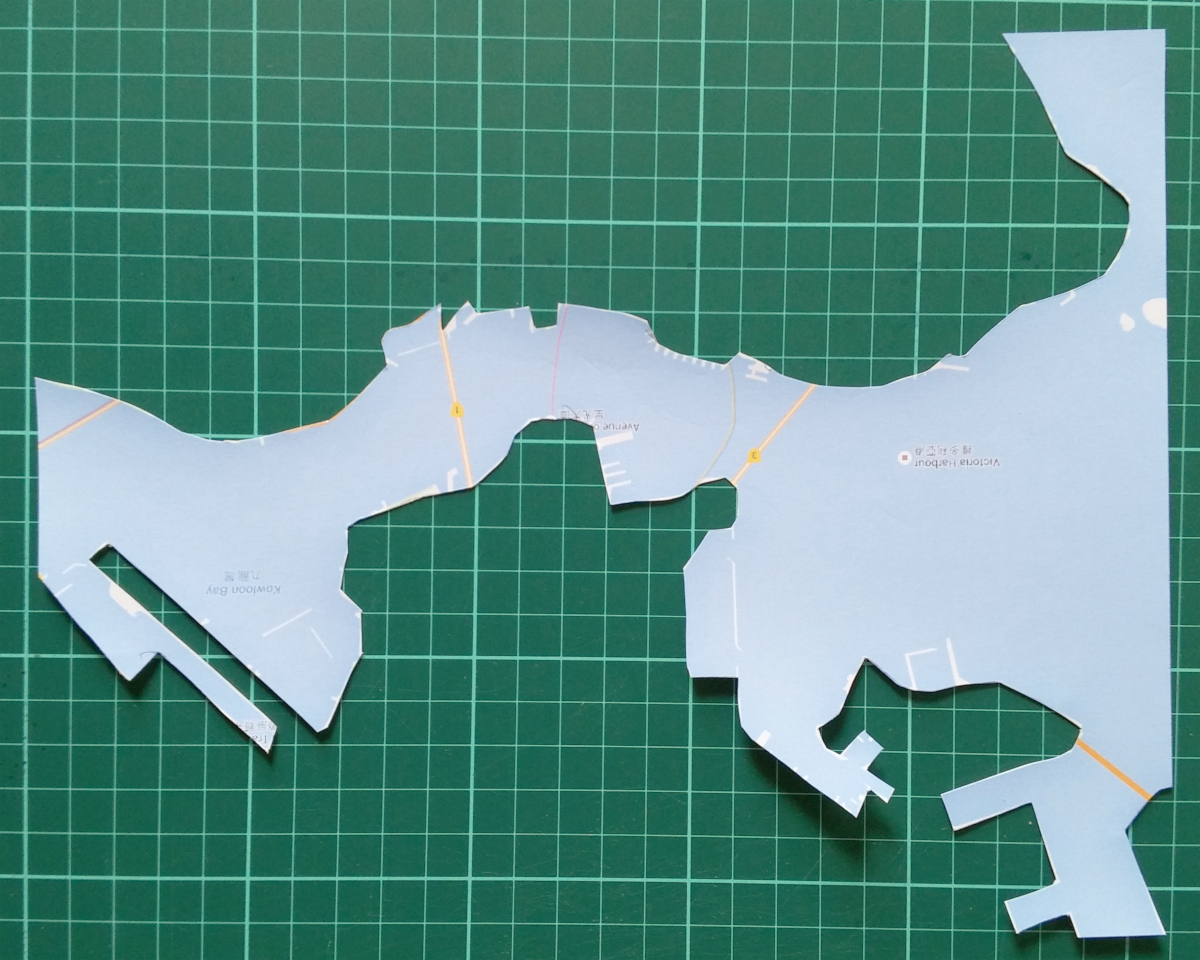
Printed map outline after cutting away the land mass
The paper outlines were then traced onto pieces of 2mm thick card, then cut out with a scalpel again, to create the master heavyweight stencils
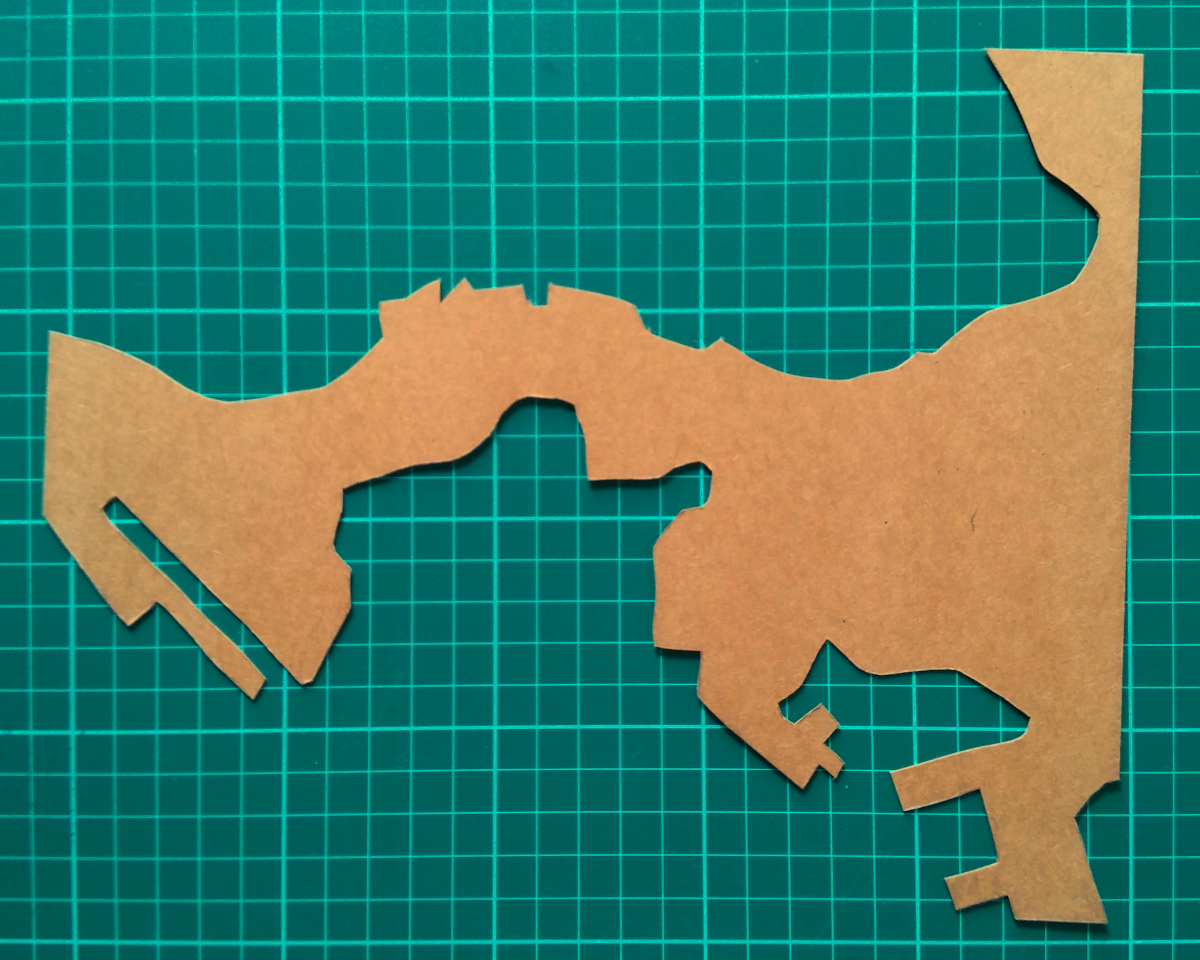
Cardboard stencil after being traced and cut from the paper outline
The purpose of the stencil is to assist in applying the resist for the chemigram process. The chosen resist was a thick paste of flour and water, the same that was used in earlier chemigram experiments. The stencil was placed on a sheet of the photographic paper and the resist spread on in a thin layer. The ultimate result was that flour paste adhered to the paper in the regions that would represent the land mass, while the sea remained clear.
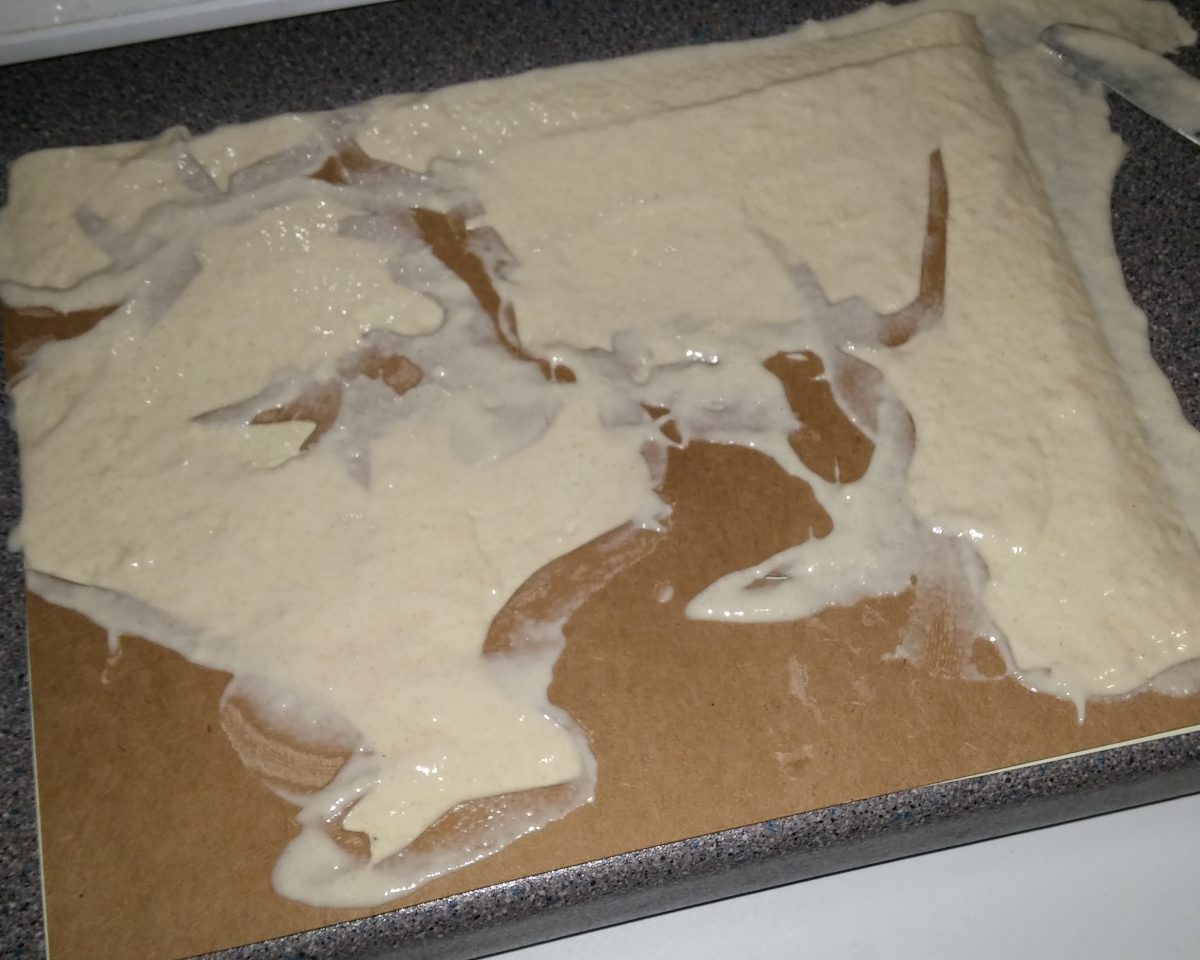
Applying a resist of flour & water to the photographic paper, using the cardboard stencil
The coated paper is then left overnight to allow the flour paste to dry out and form a hard crust on the paper. With the areas representing the sea still exposed, it was time to start on the lumen processing. The idea was to try to get an abstract texture to represent the rippling surface of the sea. To this end, several layers of crinkled clingfilm were placed over the paper in a random fashion, which would (in theory) control the amount of UV light affecting the paper.

Paper covered in clingfilm and placed in a photo frame ready for exposure under the sun
The paper was placed in a budget photo frame obtained from a local pound shop (aka dollar store) and then left out under the autumn sun for approx 4-5 hours. The UV light had quite a nice affect on the paper turning it a fairly intense purple/blue color, and the use of cling film had been partially successful in introducing variation in the colouration.
The paper after it had been exposed to the sun for several hours
The lumen exposure was immediately preserved by putting the paper through a regular fixer bath. Sadly with the Agfa Brovira paper, almost all of the colouration from the lumen exposure disappeared. This is entirely expected when fixing lumen prints, but the degree of fading varies across different papers and the Brovira seemed particularly badly affected. The final step was to slowly dissolve away the flour resist, moving the paper between developer and fixer baths every 10 minutes or so. Where the developer came in contact with the surface of the paper first, it would go dark gray/black, while the fixer would preserve undeveloped areas in pale brown. In this way the texture was gradually built-up as the flour resist dissolved. The chemigram stage took at least an hour of hard work per print to complete.
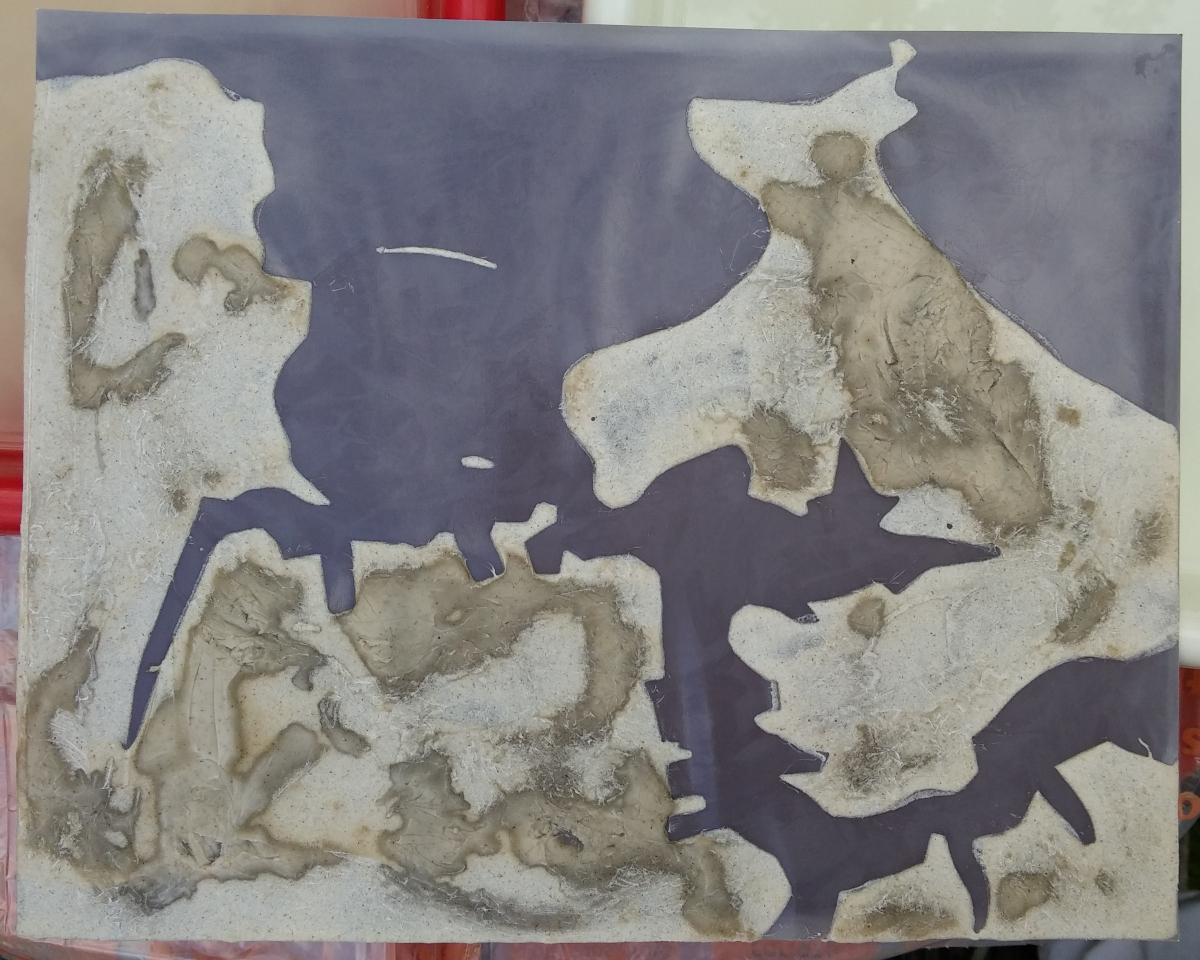
In the end six prints were made on the Agfa Brovira paper supplied for the project, and the three most successful ones were selected for presentation to the project.

Final results of the process on Agfa Brovira paper
My time producing prints for the project spanned a couple of months, with me snatching 2-3 hours at a time to work on it when the weather was favourable to lumen printing, in between the usual time consuming duties of parenting. The most time intensive part was the chemigram process where the dried flour paste would very slowly dissolve, but the results obtained were certainly worth the effort. Participating in the project helped focus the mind, allowing for intensive effort to control & master a particular set of techniques, with a clear target in mind. It has been a great learning experience and I’m very pleased to have gotten involved in it.
Vicariously enjoyed this write-up, I can only imagine how much fun (I see the effort, focus & waiting time) you had making something with your hands, resulting in fine real-world artefacts (loved the result).
Thanks for taking time to share all the minutiae. As usual, meticulous details. Tempting to try this (I’m not terribly handy, but your instructions are detailed enough to show some courage :-)).