The first part of this blog post looked at the use of honey, artists varnish and masking fluid as resists, along with use of cardboard stencils. This second part will consider two further resists and a method of creating a “stamp” for printing.
Wood varnish resist
After the disappointment of the artists’ varnish, some traditional exterior wood varnish was picked as a possible resist. The varnish is very thin, so after it was applied to the paper all the brush stokes just disappeared in a matter of seconds, resulting in a perfectly even coating. Once again Ilford multigrade RC paper was chosen, combined with Fotospeed fixer and Caffenol-C-H-UK. The varnish dried overnight for about 16 hours total resulting in a fairly tough finish on the paper. Since there was no texture in the varnish resist, it was decided to intentionally damage the resist. For one of them, a compass and blade were used to create circular arcs across the paper. For the other a series of horizontal and vertical lines were made with a knife.
Wood varnish resist applied to paper. When try, varnish was scored with a compass and blade to form circular arcs
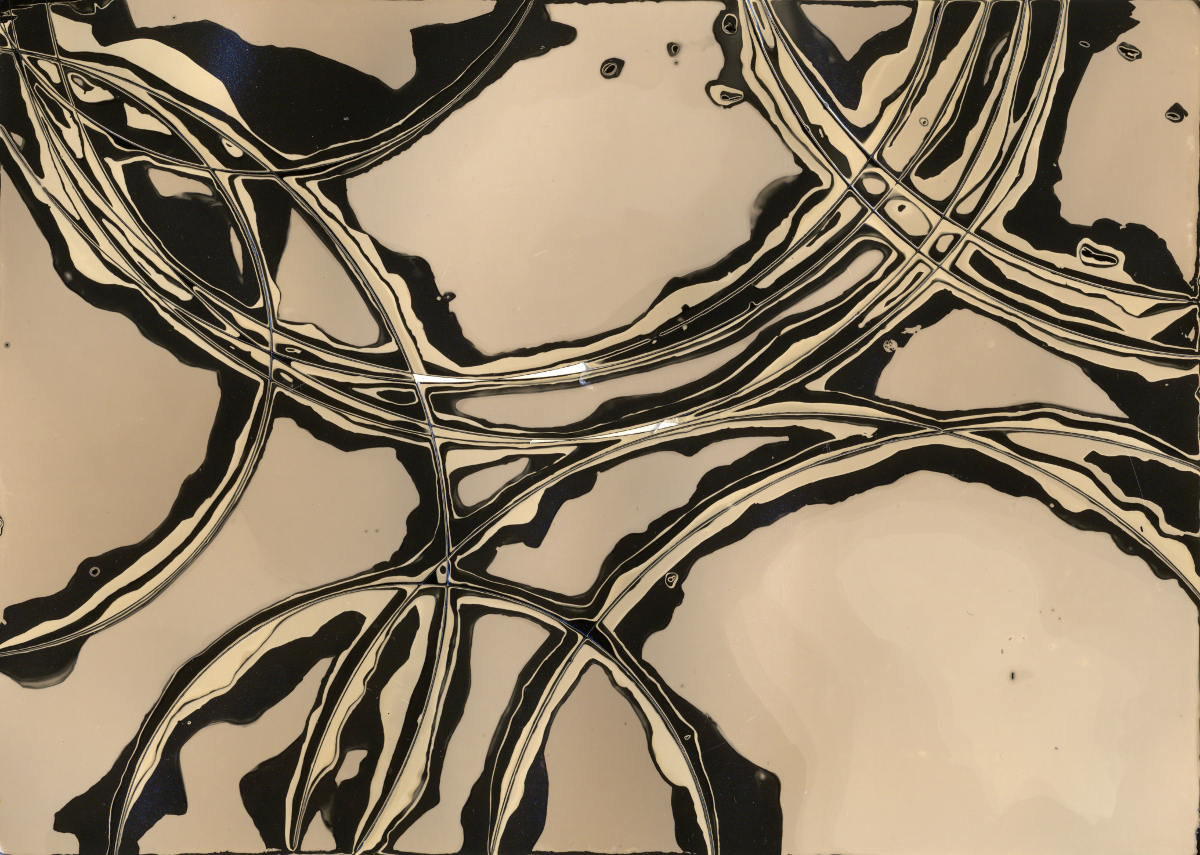
When immersed in the chemicals, the varnish resist proved very resilient and non-porous. The places where the resist had been scored with a blade allow the chemicals to penetrate by a tiny amount. After 5 minutes in either the developer or fixer, the varnish showed no sign of disintegrating, so it was decided to try rubbing the resist where the cut marks were. With some hard work this gradually exposed more paper to the chemicals. After going back & forth between developer and fixer a couple of times, the alternating bands of black & white started to appear. A problem that occurred was that the emulsion on paper started to peel up in places where the varnish had been cut, as the cut had penetrated into the paper too. Removing the large extents of varnish proved very difficult indeed – using the friction between rubber gloves and the varnish was the only way and it took about 30 minutes for an ~6×4 inch print.
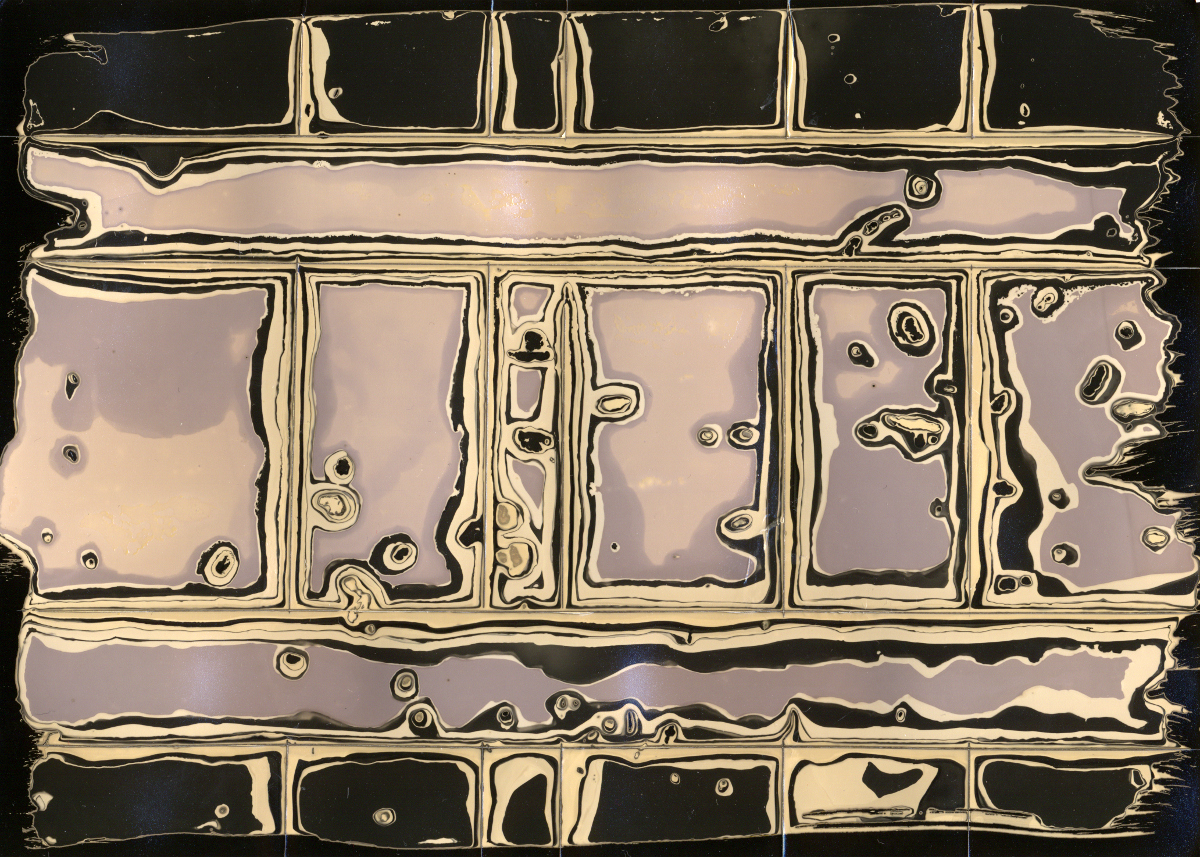
Wood varnish applied to the paper as resist, and left to dry for 24 hours. Lines scored in the varnish with a blade
The second sheet with the straight cuts rather than circular arms worked in much the same way. One interesting difference was that some of the areas exhibited a slightly purple tint, possibly where the developer only had a brief chance to work, before being fixed. Again there was a problem with the paper emulsion peeling up. Overall the graphical results of both images were very attractive, clearly showing the tell tale light & dark bands where the resist gradually came away. An easier way of working with the varnish may be to not let it completely dry – perhaps leave it to dry just enough that it no long runs off the paper. That may allow the developer & resist to penetrate more quickly.
Stamps
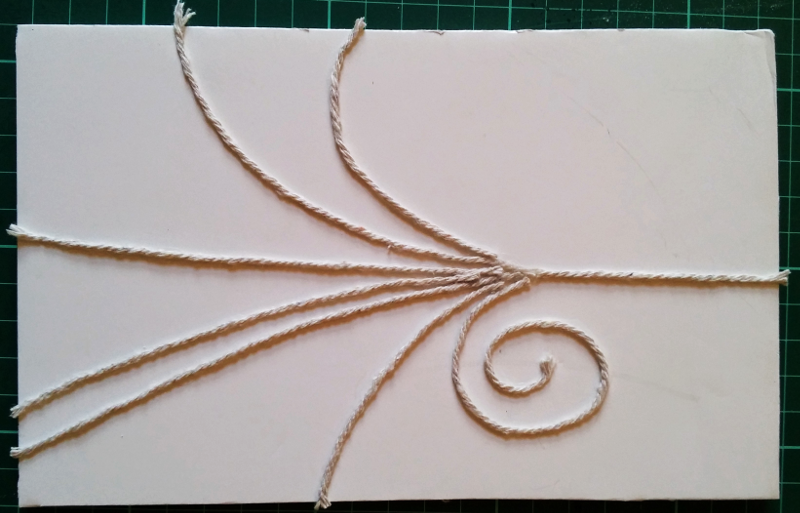
Following on from the idea of applying the developer to the paper selectively, it was decided to experiment with creation of a simple stamp to imprint an image on paper. For this purpose a piece of 5mm foam board was cut to size, to roughly match that of the paper. There needed to be some material applied that would absorb the developer. For this purpose some lengths of ordinary household string were superglued to the foam board.

String spiral stuck onto foam board to act as a stamp for applying developer to the paper.
String trails stuck onto foam board to act as a stamp for applying developer to the paper.
As can be readily seen from the images above, the designs are very simple / crude, just enough to examine whether the general concept is workable. This time Fotospeed print developer was used instead of Caffenol, and it was painted onto the string with a brush. The board was up-ended to allow any excess developer to drain off before it was turned upside down and pressed down onto the paper. The stamp was left in contact with the paper for about 60 seconds.

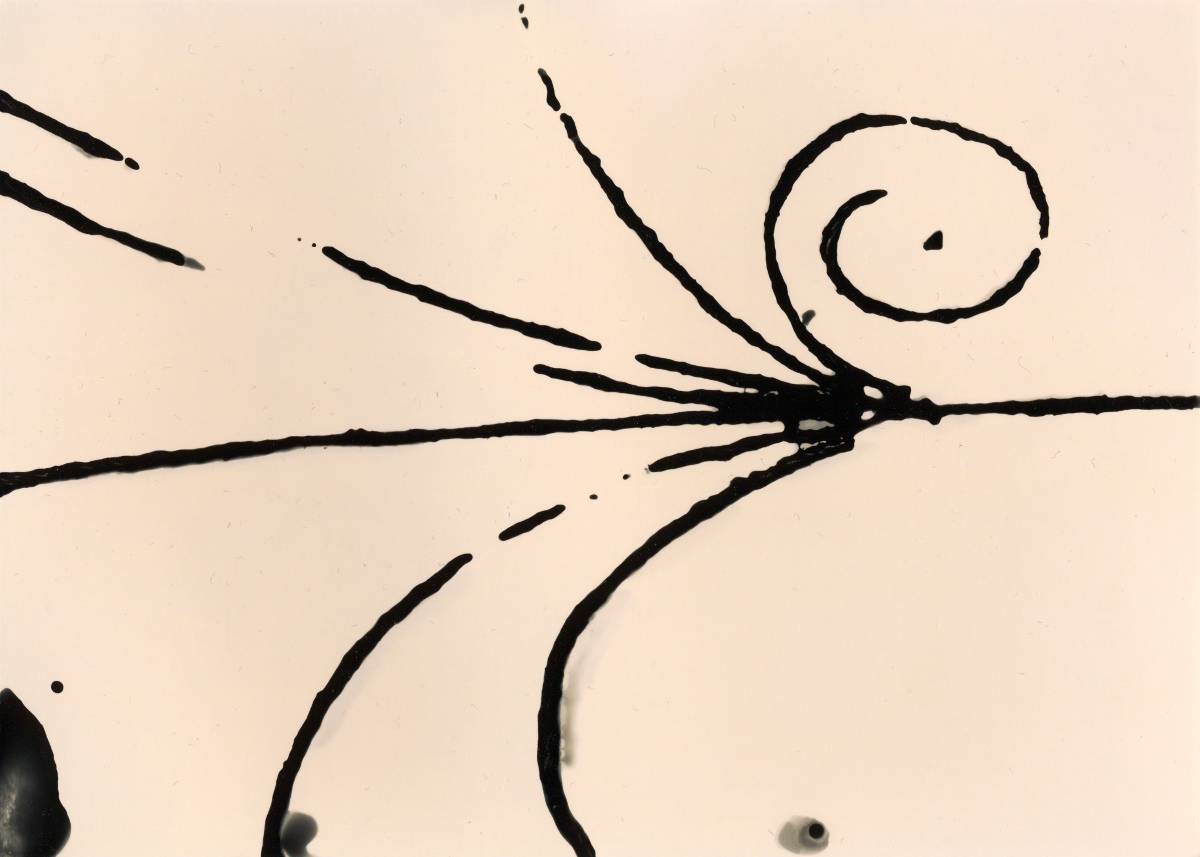
Print resulting from application of developer to the string spiral stamp.
Print resulting from application of developer to the string trail stamp. Some gaps in the image due to warped board
The results are pretty much as expected. The places on the paper affected by the developer were fairly tightly controlled. There were some gaps where it didn’t make good contact with the paper, mostly due to fact that the foam board was slightly warped. With a well made stamp, the general approach could allow for reasonably detailed figurative images to be created.
Flour paste resist
For the final experiment another type of resist was tried out. Taking a small quantity of regular baking flour, water was slowly added until a thick paste was formed. Two sheets of expired Ilford FB paper were then coated as evenly as possible with the resist and left to dry. As should be expected from fibre based paper in contact with water, it curled up hugely when the paste was applied. The flour paste resist was left to dry for 24 hours, during which time the surface started to crack up slightly

Expired Ilford FB paper covered with flower resist and allow to dry and crack.
The theory behind the use of a flour paste, was that the once dry it would provide a relatively hard & well attached resist, that would none the less dissolve fairly easily in the developer/fixer. The dried papers were placed alternately in the developer and fix baths for a couple of minutes at a time. Gentle rubbing was used to encourage the resist to dissolve and come away from the paper. Flexing the paper also encouraged further cracks to form in the resist which allowed the chemicals to work their magic. At times moderately large lumps of flour could be detached from the paper.
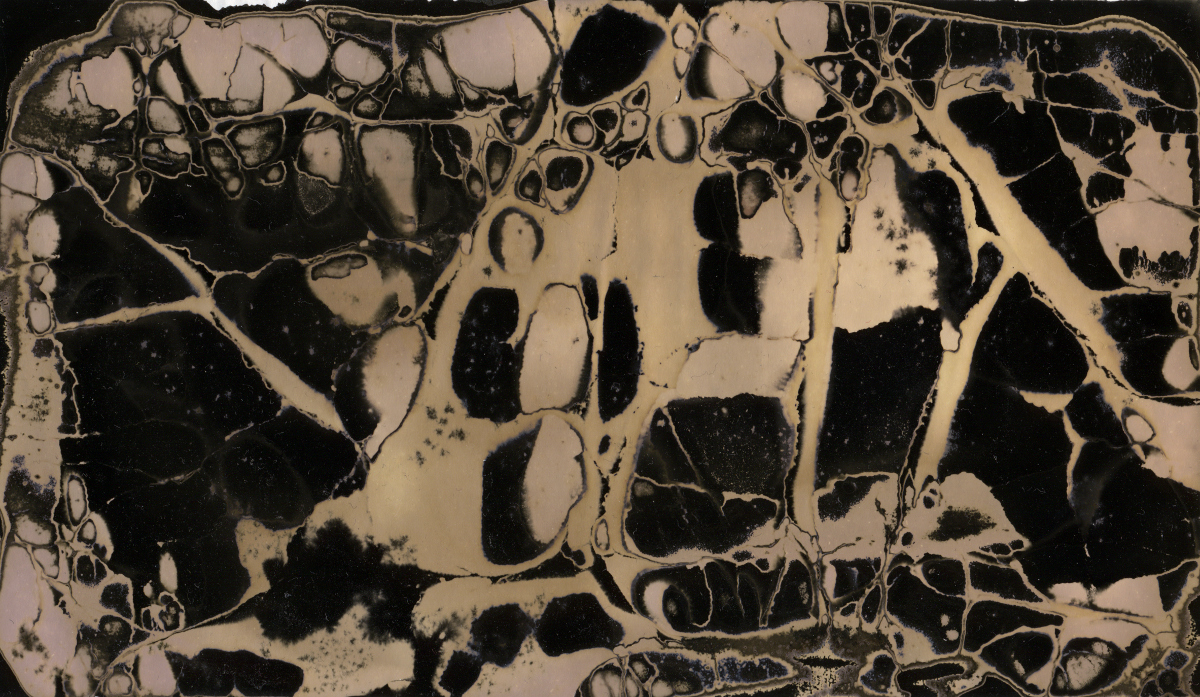
Image created from dried flour and water resist.
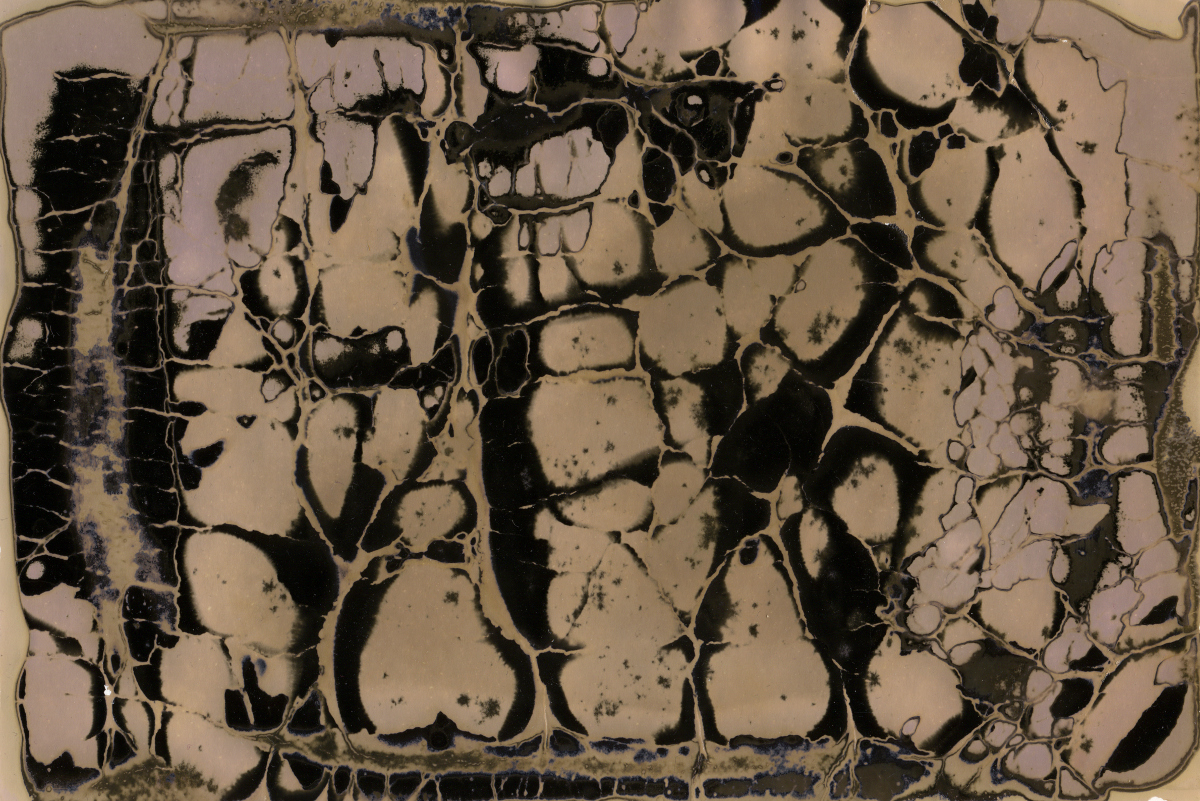
Image created from dried flour and water resist.
The results of the flour paste resist were quite satisfying. The distinct channels / lines in the image come from where the dried resist had cracked up. There was a reasonable degree of control over the image thanks to the ability to gently prise off chunks of the resist where needed. There was clearly still a very high degree of randomness involved in the images though, so rather than saying the process was controlled, it is perhaps better to say it was just influenced. The images apear to bring to mind the idea of organic cellular structures.
The two resists illustrated in this part of the blog were both much more successful than those from the first part of the blog. The wood varnish and flour paste were both very effective in the way they allowed interesting images to form, but the results have very different characteristics and the way they were worked in the chemicals was very different too. These results clearly show the importance of choosing the right type of resist to achieve the desired graphic effect on the final image. Experimentation and an open mind is key, because it appears hard to predict how any individual substance will perform in the real world.
With a set of experiments out of the way, now it is time to move on and attempt to create some presentable works of art.
Very insightful. This is photography, art, and science. If you could blend in astronomy you’d complete your tagline.
You and I have a lot in common when it comes to making photographs and experimenting! Would love to trade ideas!
Wondering when you dry these papers for say 24 hours, do you dry them in a darkroom or out in the light? Thanks!
It is fine to dry in the light. Chemigrams are not “painting with light” as you do with traditional darkroom development, instead you are “painting with chemicals” and in fact most people will create chemigrams in daylight conditions, not red-light conditions.