Following my attendance at a London Photographic light painting workshop, I decided that I wanted to build myself a light stick, suitable for producing light trails and more. This is basically an approx 1m long strip of wood, with leds running down the side. You can’t buy them off the shelf, but the constituent parts are all readily available from eBay.
The Parts
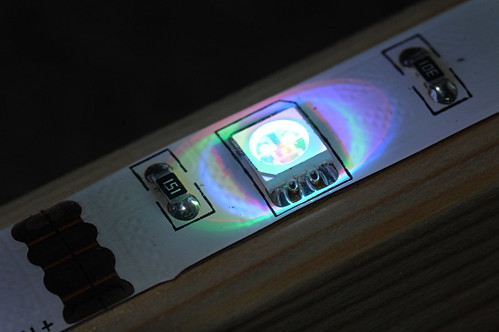
At its heart, the light stick is just a strip of 5050 spec SMD (surface mount device) RGB LEDs, with a density of 30 LEDs per metre. These strips actually have 3 LEDs at each location, one red, one green, one blue.
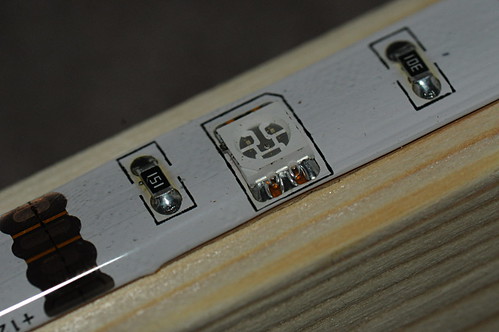
Don’t be tempted by the alternate 3528 spec SMD strips, since these produce a much dimmer light. The LED strips are produced to a variety of weather proof standards, with the IP65 rating being the most suitable for building light sticks, since it encases just the top of the LED strip in what appears to be a translucent silicone sealant. The RGB LED strips usually come with a IR remote control device, with either 24 or 44 keys, which allow for choice of constant light colours, or various transition effects between colours. I purchased a 5m long reel from eBay which had a 24 key IR remote. The strips can be safely cut every 10cm, so if you can source additional IR receiver units, one reel can be used to build multiple light sticks
The 5050 LED strips require a 12volt power source, usually from a small mains AD/DC adapter. This isn’t much use for light painting which is going to take place outside, far away from any mains source. The solution is to just use a set of 8x AA batteries wired in series to get to the 12v mark. Again I turned to eBay to purchase a simple 8 battery holder. The battery pack has a PP3 connector, so another trip to eBay obtained a PP3 terminated cable.
For the stick itself, I made a trip to a local DIY store to pick up a length of wood measuring approx 2cm by 4cm, and some cable clips.
The Assembly
With the parts obtained, it was onto assembly of the light stick. The first step is deciding how long a stick to make. The LEDs come in a minimum of 5m lengths, which have explicit markings for where they can be safely cut every 3 LEDs (approx 10 cms). I decided to make a 90cm long light stick, giving 27 LEDs in total. I first cut the LEDs to the right length, used them to measure the exact same length for the stick, and then cut it to size.
The LEDs come with an adhesive backing tape, so they can be stuck directly to the narrow side of the wooden stick with minimum of fuss. With that done, the next step was to attach the IR receiver unit to the wider side of the stick and fasten the cables with a few cable clips.
The only remotely difficult step is connecting the battery cable to the IR receiver power cable. To do this I stripped the insulation off a 1 cm length of each cable, then simply soldered the two cables together. I used a short piece of heat-shrink to cover the solder joint and then wrapped the whole cable in layers of red insulation tape to make it a nice & robust.
The only unsatisfactory part of the exercise, was attaching the battery pack to the stick. With the shape of the battery pack I had purchased, there was no effective way to permanently connect it to the stick without making it impossible to later remove the batteries for recharging. In the end I went for the high tech approach of using 2 elastic bands.
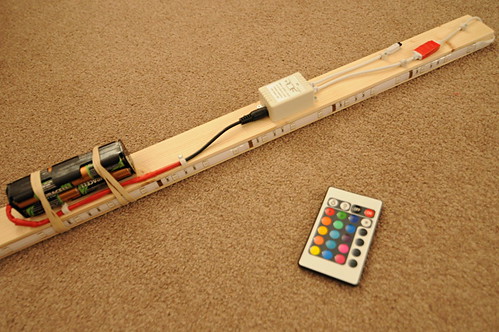
The image above shows the finished product. For reasons of weight distribution, the battery pack is located 1/2 way along the stick, directly in its center, though you can’t see that in the above picture since I cropped out the boring 1/2 of the stick. The white box is the control unit for the LEDs, the power supply cable pluging in on the left hand side of the unit. On the right hand side, the top cable with the black terminated end is the IR receiver sensor, while the other cable takes power to the LED strip itself. The coloured buttons on the remote control, self-evidently, map to the desired colour of the LEDs. The other buttons control brightness, on/off and 4 different colour fading patterns.
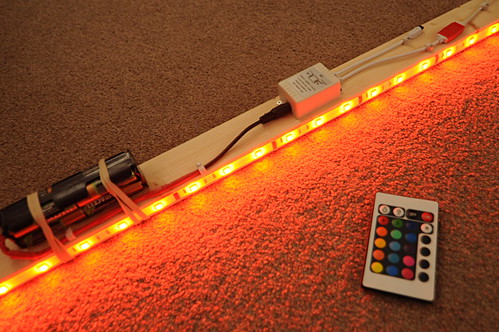
The Demo
Only completing the device on Sunday evening, I have not yet had an opportunity to go outside and try it in the real world. I did however, do a very quick test inside to see how well it handled. Based on this test I decided that using a remote control isn’t the most convenient thing. It would be better to have a simple on/off switch directly on the light stick. By simple I mean, I attached the remote control to the stick using another elastic band, pointing at the IR sensor :-)

It is now possible to get the IR controller boxes in a dramatically smaller form factor. eg
http://www.ebay.co.uk/itm/5-24V-Mini-Wireless-IR-Remote-RGB-LED-Strip-5050-3528-Controller-Dimmer-24-Key-/141009380288?pt=UK_Home_Garden_Lighting_Parts&hash=item20d4d063c0
search ebay for “led 5050 ir controller mini 24 key” or “led 5050 ir controller mini 44 key”