I don’t have space for a darkroom at home, and while there are still a number darkrooms across London that provide training and rental, this quickly gets expensive and lacks convenience due to travel time involved. As such I have an interest in traditional photographic techniques which can be performed under normal interior or exterior light conditions. Film development requires nothing more than a changing bag to transfer the film to the processing reel. The cyanotype process only needs limited darkness after coating the paper while it dries, thereafter the actual exposure takes place outside in direct sunlight or via a UV exposure unit. While the chemigram process could be done in a darkroom, it is most commonly done in daylight as image formation doesn’t rely on light, but rather interaction of the chemicals to write onto the paper.
Continuing with this theme, the time came to try out the Lumen printing process. Many people are familiar with the photogram technique. Objects are placed directly onto light sensitive paper, which is then exposed under a enlarger, typically forming silhouettes of the objects where they blocked the light source. The paper is then processed in developer and fixer following the normal black & white printing process. This of course requires use of a darkroom.
Those who have handled traditional black & white photographic paper may have noticed that when it is exposed to daylight it slowly changes colour. Normally this would be a disaster making the paper useless for further photographic use. The Lumen printing process though, takes advantage of this behaviour in combination with a photogram like technique. Objects are placed directly onto light sensitive paper, and it is exposed to a light source, but this time it is either sunlight or a UV exposure unit. Over the course of the exposure, which can last anywhere from 20 minutes to several hours, the photographic paper will gradually change colour forming a silhouette of the objects. Once the paper is exposed, it would NOT go anywhere near photographic developer as that would just turn the entire paper uniformly black. Instead it is placed straight into a fixer bath, followed by an archival wash
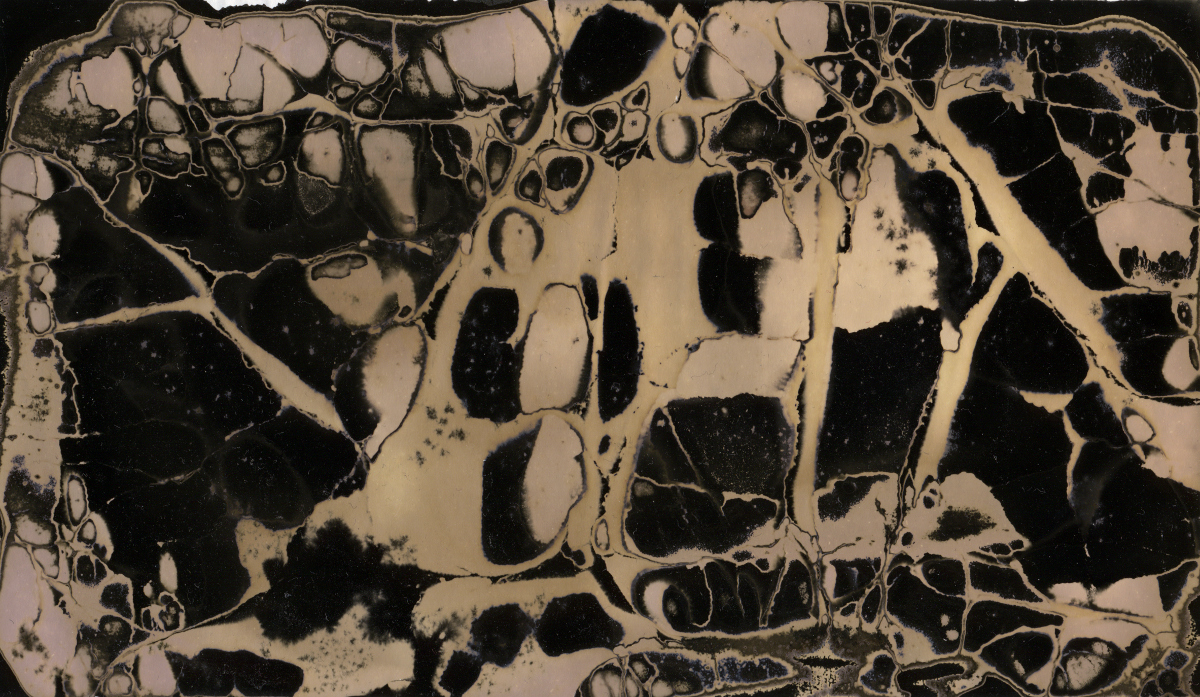
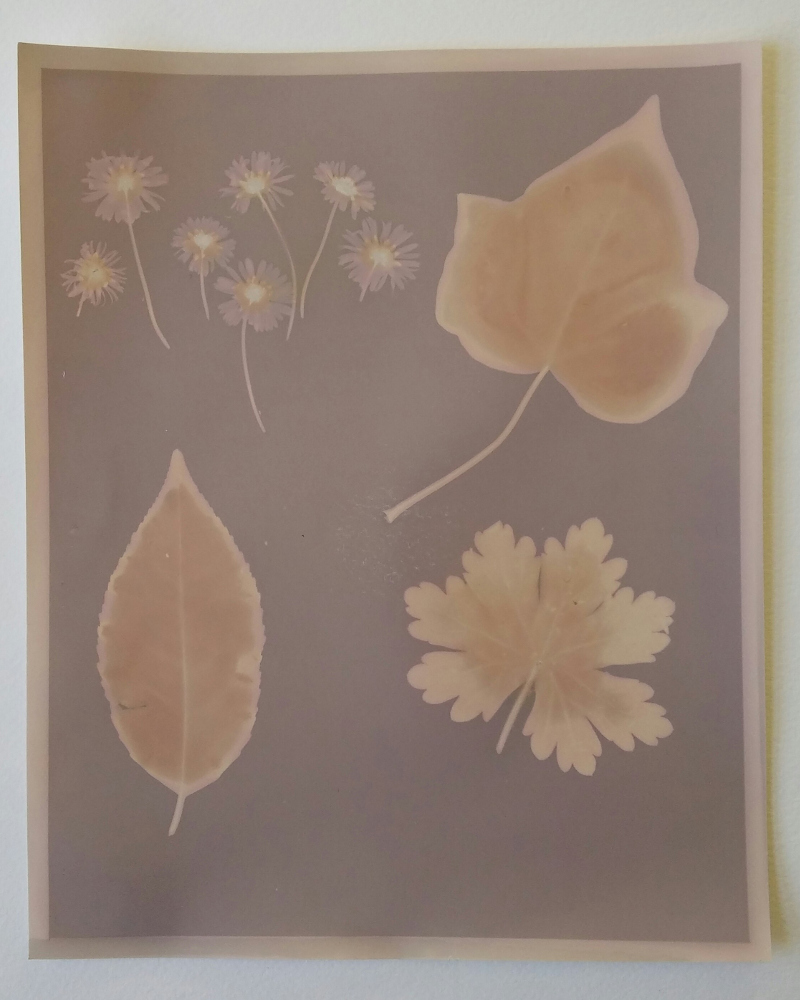
The image initially visible after exposure can be quite intense, but this will sadly fade somewhat during the fix, and the colours will also typically shift in tone. The result is an image which is fairly low contrast with quite subtle tones. What is surprising is that despite the use of black and white paper, the image will actually exhibit significant colouration. This is markedly different from what is seen when creating photograms where the image is still strictly black and white and high contrast.
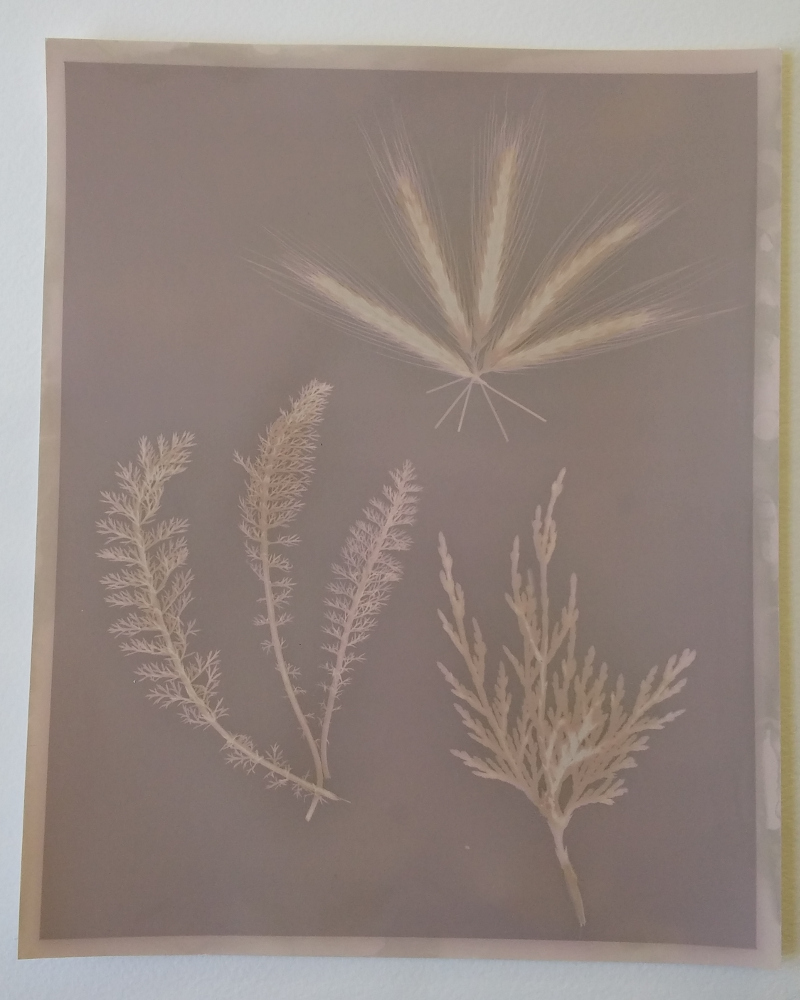
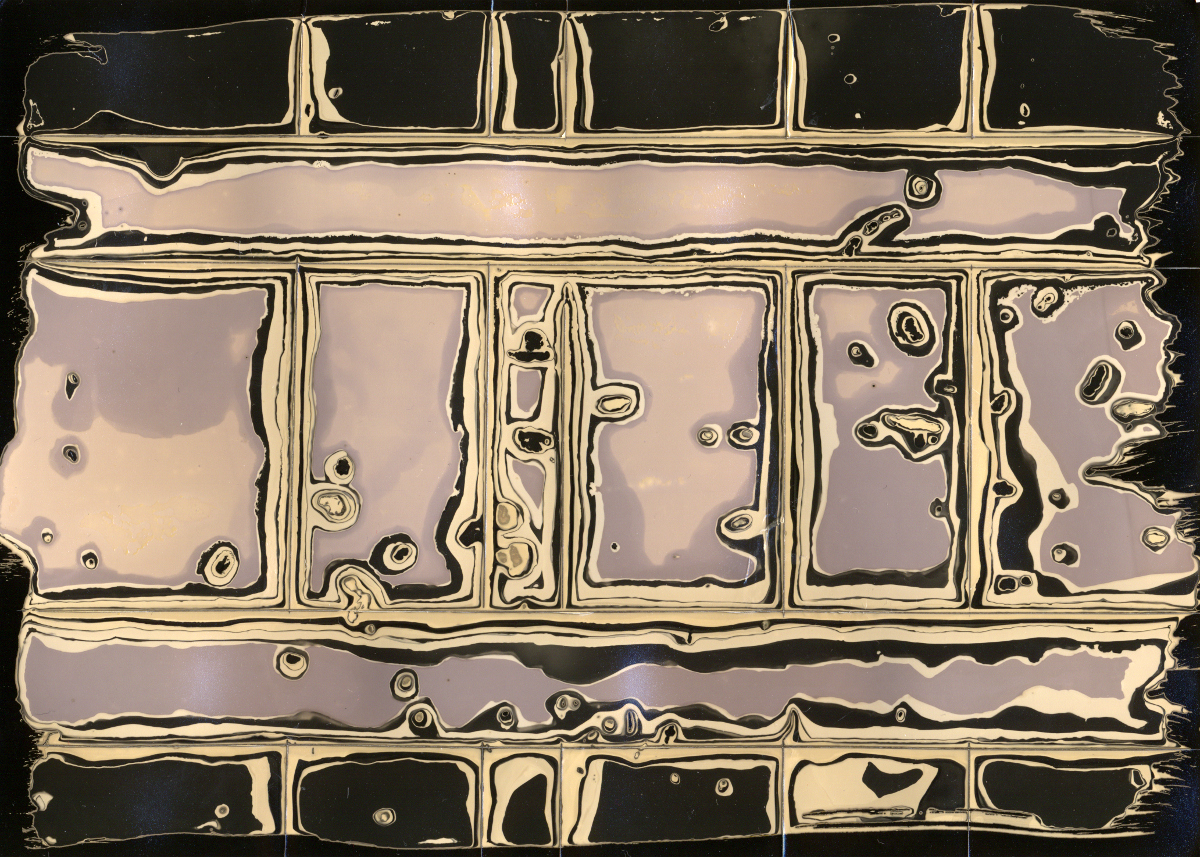
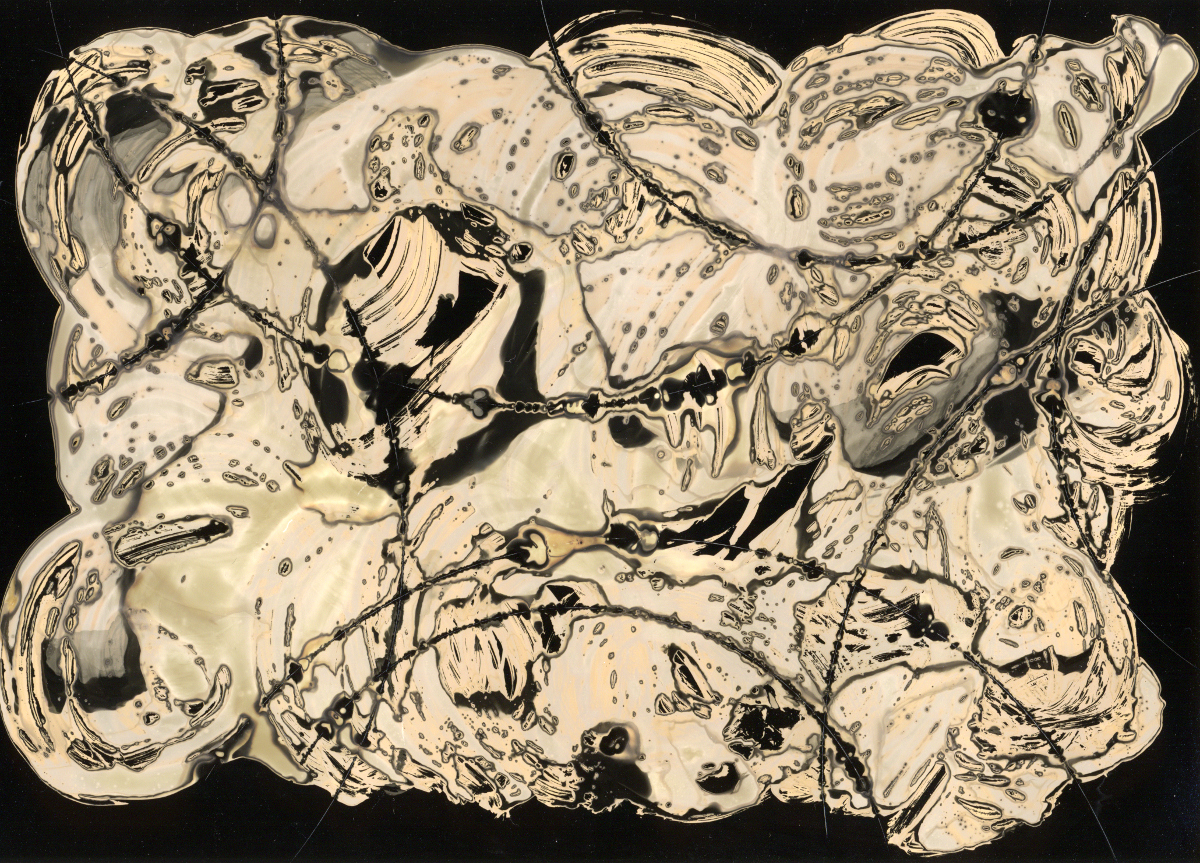
A simple lumen plrint made with planet cuttings. The image is fairly low contrast and mostly shows an outline of the plants.
There are a variety of factors which will influence the colours obtained in a Lumen print. A non-exhaustive list would include
- Type of paper – each paper has a unique chemical formulation in its light sensitive coating(s) and as a result will behave differently when exposed to UV light
- Age/condition of paper – the chemical formulation of the light sensitive coating(s) may change and degrade over time, depending on the way in which it was stored, which will in turn alter how it reacts with UV light
- Time of exposure – the paper may undergo several colour changes as it receives increasing amounts of UV light. For example, it might start white, then go yellow, then blue. So varying the length of exposure will alter what colour the final image has.
- Opacity of the objects – objects which are partially transparent to UV light will allow a range of exposures across the paper. Since colour is dependant on the amount of UV light, partially transparent objects can result in a range of colours being visible in the image.
- Water on the paper – any water that is in contact with paper during exposure can influence the colours formed. The water can be applied manually, or it can leach out of the object (eg fresh cut flowers/plants) on the paper in the heat of the light.
- Type of light source – while direct sunlight and UV exposure units both produce UV light, the sun provides a much broader spectrum, so will have a different effect than narrow band UV lamps. The sun is also a much more diffuse source than a lamp just millimeters away from the paper.
- Toning of paper – the initial image will change and fade significantly during fixing. By toning the paper before fixing, it is possible to retain more intensity in the image and/or alter the colouring.
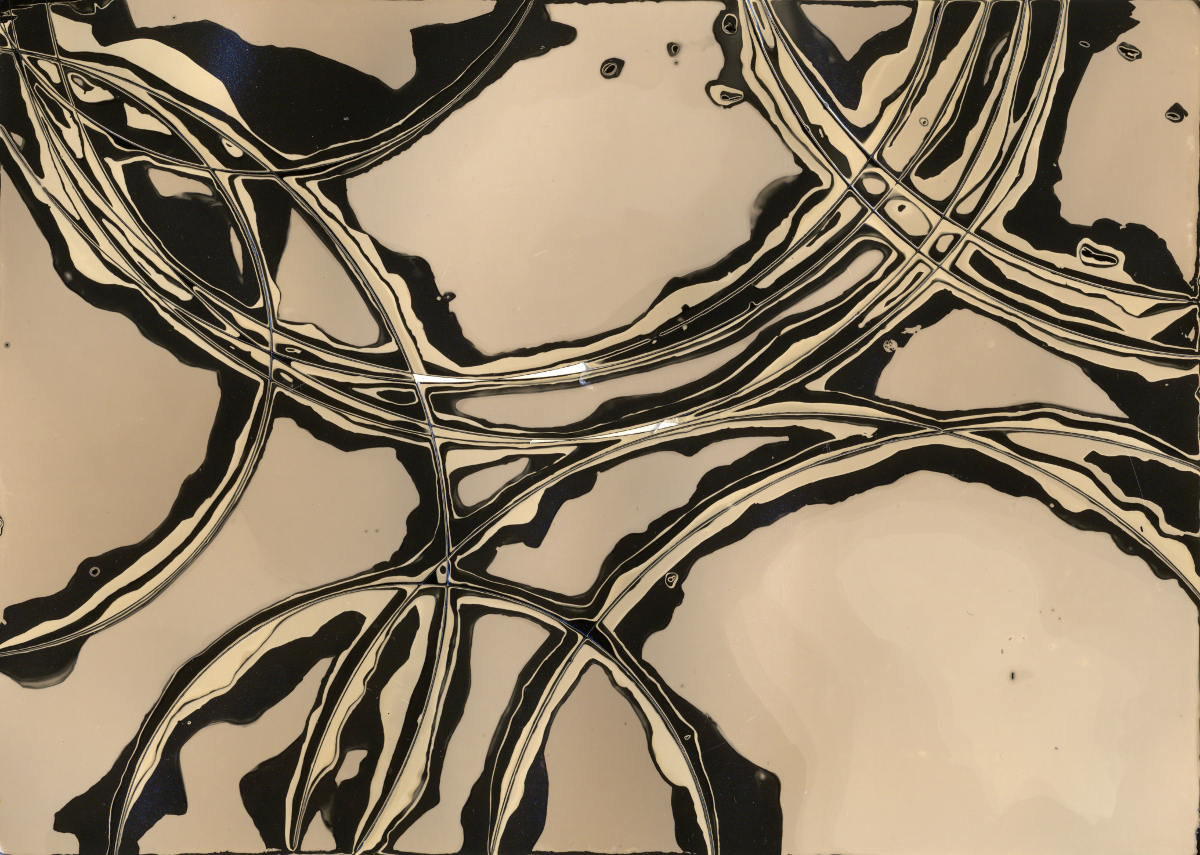
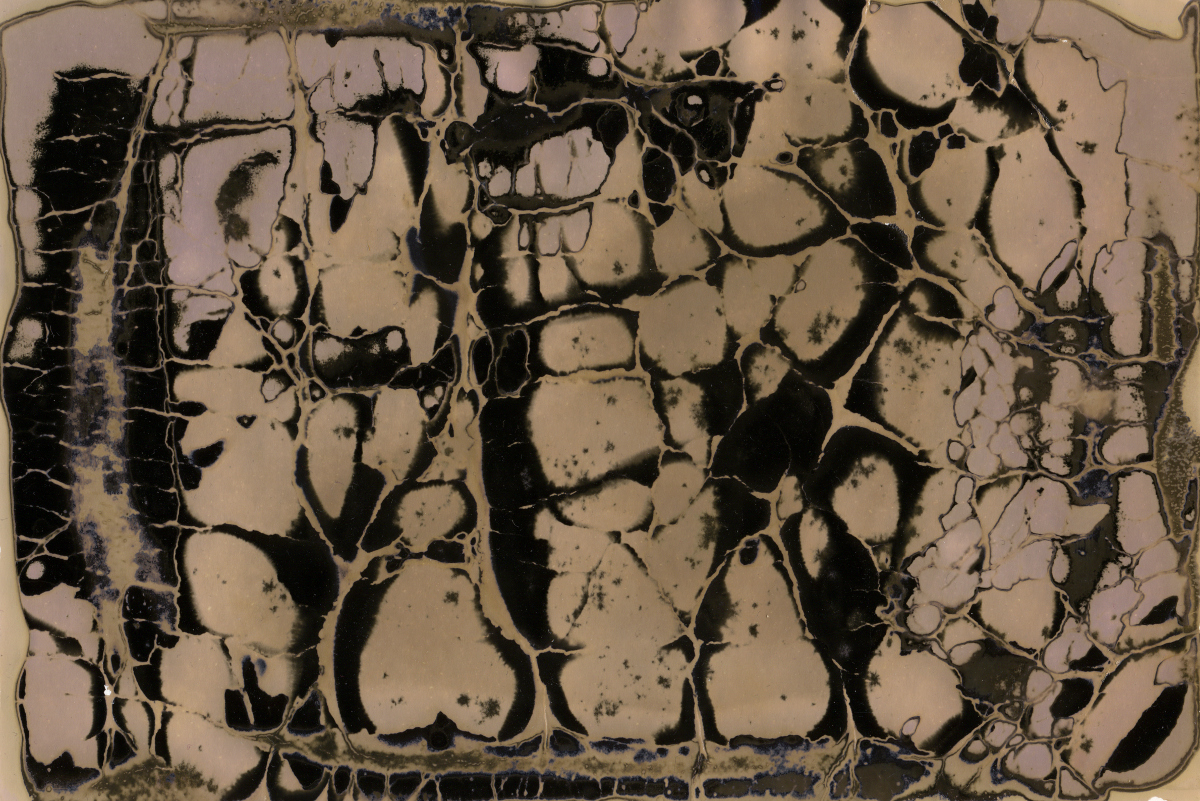
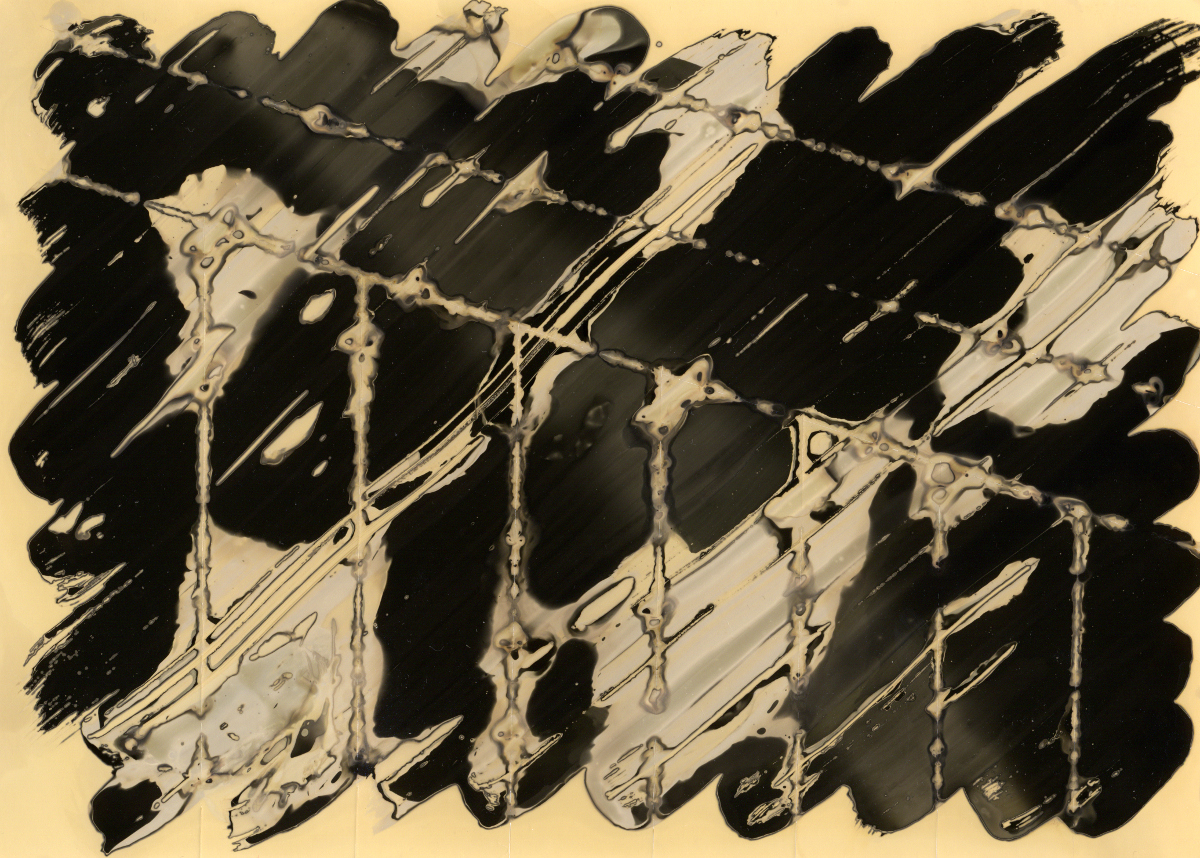
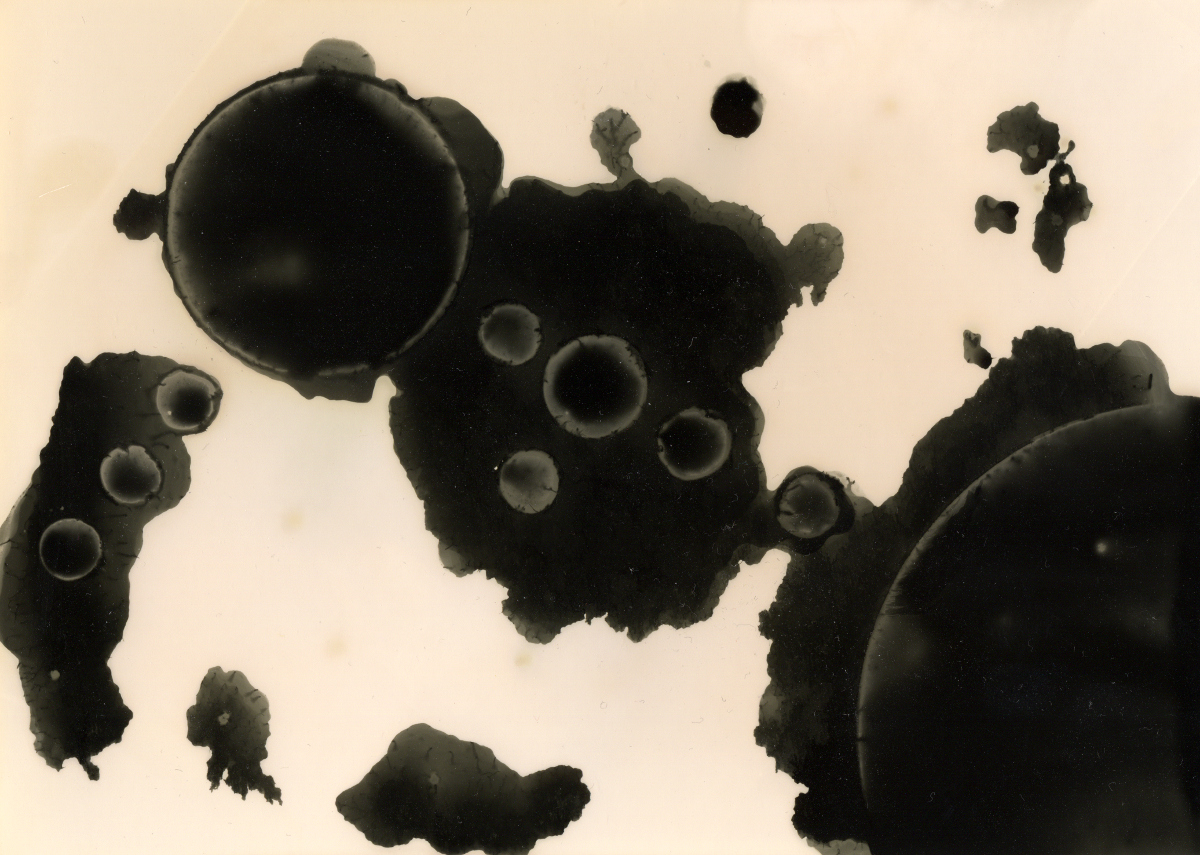
A Lumen print exhibiting varying colour tones. The image is dark purple where the paper was fully exposed, pale pink where fully obscured from light, and a yellow/brown where moisture from the leaves affected the paper
While some objects are heavy enough to make good contact with the paper and resist movement on their own, with others it might be necessary to weigh things down with a sheet of glass. This is particularly needed when using flowers and other plant material to form the image. There are a variety of options for this task. Those with existing darkroom equipment may well have one or more contact printing frames. These are quite expensive to obtain even on eBay, so more economical options are to obtain some suitable sheets of glass from a local glazing supplier, or use a cheap photo frame. With the prevalence of pound / dollar stores, finding cheap photo frames is remarkably easy. Why spend £50 on one contact printing frame, when you can buy 50 photo frames for £1 each. Being able to expose many prints at the same time will dramatically improve productivity, so it makes sense to go cheap and obtain many frames. It also means you won’t care if they get damaged or broken during use

An 8×10″ sized glass photo frame from a pound shop, to use for contact printing
One important thing to note is that the photo frame should have quick release clips for the backing board, not tacks that require pliers to remove and a hammer to re-insert !
An 8×10″ sized glass photo frame from a pound shop. The quick release clips allow easy changing of paper.
To use them, open up the back place the objects onto the glass in the arrangement desired. Remember to flip the arrangement left-to-right at this stage, since you’re looking at the image from the back, not front. Then place a sheet of B&W photo paper on the object, so the emulsion side is in contact with the objects. Finally replace the photo frame back and secure the clips in place. There should now be good contact between the objects and paper to ensure they are held still and make good contact for crisp edges. The pressure also helps to squeeze fluids out of plants which can help with colouration of the print.
With the frame prepared, flip it over, place it in direct sunlight and leave it for a while. Over time the colour of the paper will change where it is exposed to the UV light. At a minimum 15-20 minutes will probably be needed, but don’t be afraid to leave the image exposing for hours. Given the length of time involved, it is worth preparing many frames and exposing them all at once. When the desired arbitrary amount of time has elapsed, disassemble the frame to remove the photo paper and place it into the fixer. As mentioned earlier, the intensity of the image will fade somewhat and the colours may also change significantly. Once an archival fix and wash is completed though, the image should be stable thereafter.
The cyanotype process is often said to be one of the simplest to photographic techniques to teach people, but it is clear that the Lumen process gives it a good run for its money. If preparing your own materials, cyanotype requires a little bit of care in mixing the right quantities of chemicals for coating the paper. The Lumen process requires no preparation of the paper – it is merely necessary to mix up fixer at the documented dilution factor. There is a slight burden on Lumen printing when it comes to disposing of the fixer, as it will become increasingly contaminated with silver as more sheets are fixed. Overall though it is a quite straightforward and satisfying process to work with. It is hard go go wrong, beyond exposing for too short a time, so even with no prior experience you’ll get some decent results.