Through the London Photographic Meetup group I’ve been to many different photographic workshops, learning a great deal. Over the past couple of years, the group has had quite a strong focus on lighting related workshops, covering various aspects of studio lighting & off-camera flash. It was one of the off-camera flash workshops, 3 years or so back, that motivated me to create the Entangle Photo application for Linux desktop users.
The workshop that I’ve long wanted to attend, but never had the chance to, is their “Light Painting” one. Last week I finally got the opportunity and was not disappointed. The location varies from event to event, with this particular workshop taking place in Green Park. We started out in a cafe where the organizers described the various pieces of equipment we’d be using. There were basically two devices, a light string (a long cable with a bundle of 30 leds on its end) and a light stick (a ~1m long piece of wood with an led every ~3cm). Neither are things you can buy pre-built in the shops – the London Photographic organizers home-build them all from electronics purchased on eBay.
Setup
The weather was a bit on the iffy side, so we started out with umbrellas being held over our cameras, but we didn’t let that put us off the evening’s activities. In any case, the rain had pretty much stopped after the first 30 minutes of the session. The plus side was that the rain made the ground reflect a little more of the light. As might be expected, the exposures are on the long side, with the iso/aperture dialled in to achieve the desired ambient illumination, while still allowing on the order of a 1 minute shutter opening to give time to produce the light effects. Needless to say, the cameras were on tripods and shutters triggered using cable release. With such long shutter speeds, we’re shooting in “bulb” mode with someone counting time on a stopwatch.
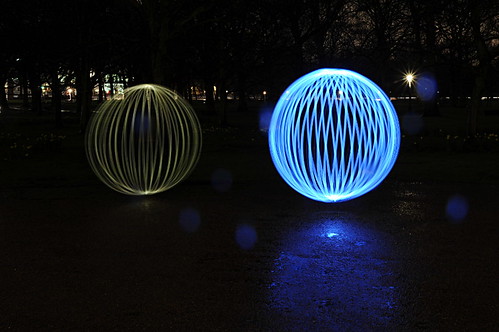
Light orbs
The first effect attempted was to produce basic light orbs. These are achieved using the light strings, by swinging the string in a circular motion in front of your person, while slowly rotating your feet through 180 degrees. Done correctly this results in an attractive orb shape
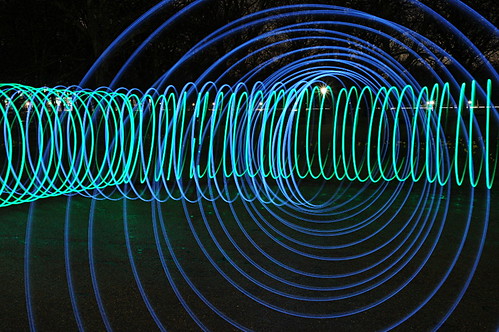
Light tunnels
Another effect that can be produced using the light strings, are tunnels / tubes of light. The starting premise is much he same as for the light orbs, simply swinging the string in a circular motion in front of your person. Instead of rotating on the spot though, you slowly walk forward / around the scene.
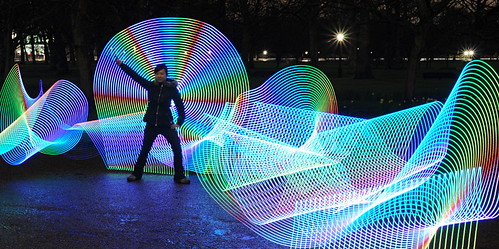
Light trails
Following on from the basic light orbs, the organizers got out the light sticks. The light sticks have fancy controllers for choosing between a range of different colours, or even strobing through the colours in a sequence. The technique is simplicity itself, simply turn on the light stick and walk it around the scene. The key is to keep your motion of the stick fluid, to avoid jagged edges on the light trails.
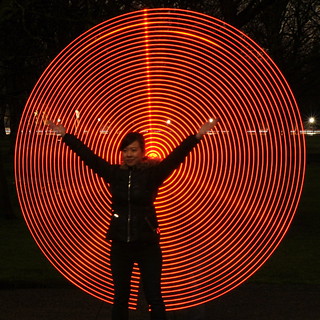
The Peacock
As mentioned above, smooth movement of the light stick is key to getting continuous light trails. For the next trick, the goal was to produce perfect circles of light. Acceptable results cannot be achieved by hand-holding the light stick, so the trick here was to put a bolt through one end of the light stick, and then fasten this to a tripod head in some manner. The light stick can now be smoothly rotated through 360 degrees, producing perfect circles of light, which I’ve named “The Peacock”
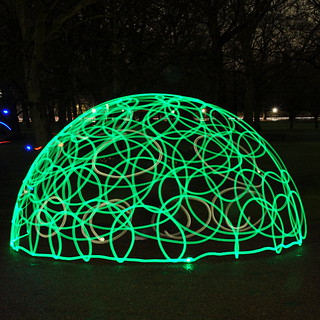
The Brain Orb
The final technique of the night was the most difficult and time consuming. This involved a long pole, with a bundle of leds on its end. Kneeling in one spot, the goal is to trace out a sequence of hoops gradually building up the doom pattern, which our organizers nick-named “The Brain Orb”, though it reminds me of an igloo.
Parting thoughts
The general aim of the workshop was for the organizers to demonstrate the techniques above so that we, as photographers, understood how to achieve the various different light painting effects. The workshop lasted several hours, late into the evening, but even with the small group (~15 photographers) there wasn’t time for us to try out every technique ourselves. The idea is that after completing the workshop we’d have the knowledge required to go off and put the techniques into practice ourselves. I’m certainly intending to do some experimentation in this area myself. The organizers themselves did a great job at running the event & getting through the material. If anyone reading this is interested in light painting, and based in London, it is well worth keeping your eyes open for future repeats of the light painting workshop (won’t be until autumn time though, due to need for dark evenings!).
One idea I had to improve the results from “The Peacock” technique is to bring in an off camera flash. The camera settings are dialled in to expose for the ambient, while giving plenty of time for the light painting technique. What we can’t do with this, is get a nice exposure of the subject’s face. By adding in a low power pop of off-camera flash at the end of the exposure, we could nicely bring out the features in the subject’s face.
