The previous blog post introduced the chemigram process, a means of creating images using photographic materials to write with chemistry instead of writing with light. This post will examine some of the initial experiments personally undertaken to explore and gain an understanding of the process.
Honey resist
For the first attempt at making chemigrams, I used Ilford Multigrade RC paper, and covered it in a resist of set, but still easily spreadable, honey. I applied the honey with a kitchen knife and attempted to smooth it out as much as possible over the entire sheet of paper. None the less it was still a fairly uneven thickness. Fotospeed FX30 odourless fixer was paired with Caffenol C-H-UK developer and water stop bath. It immediately became apparent that caffenol is not the best choice of developer for chemigrams. Functionally it worked just fine, but practically it was a pain as the opaque brown colour prevents the changes in the chemigram being visible without removing the paper from the dev. Still, we must work with what we have at hand, and that happened to be caffenol this time.
The paper was switched back and forth between the developer and fixer, allowing anywhere between 30 and 120 seconds in each chemical at a time. The honey resist proved fairly stable, adhering to the paper well and gradually dissolving over about 10 minutes. There was little need to agitate the trays nor to manipulate the resist.

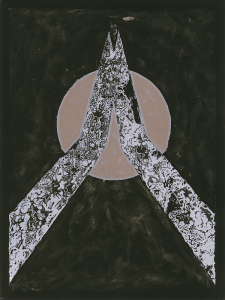
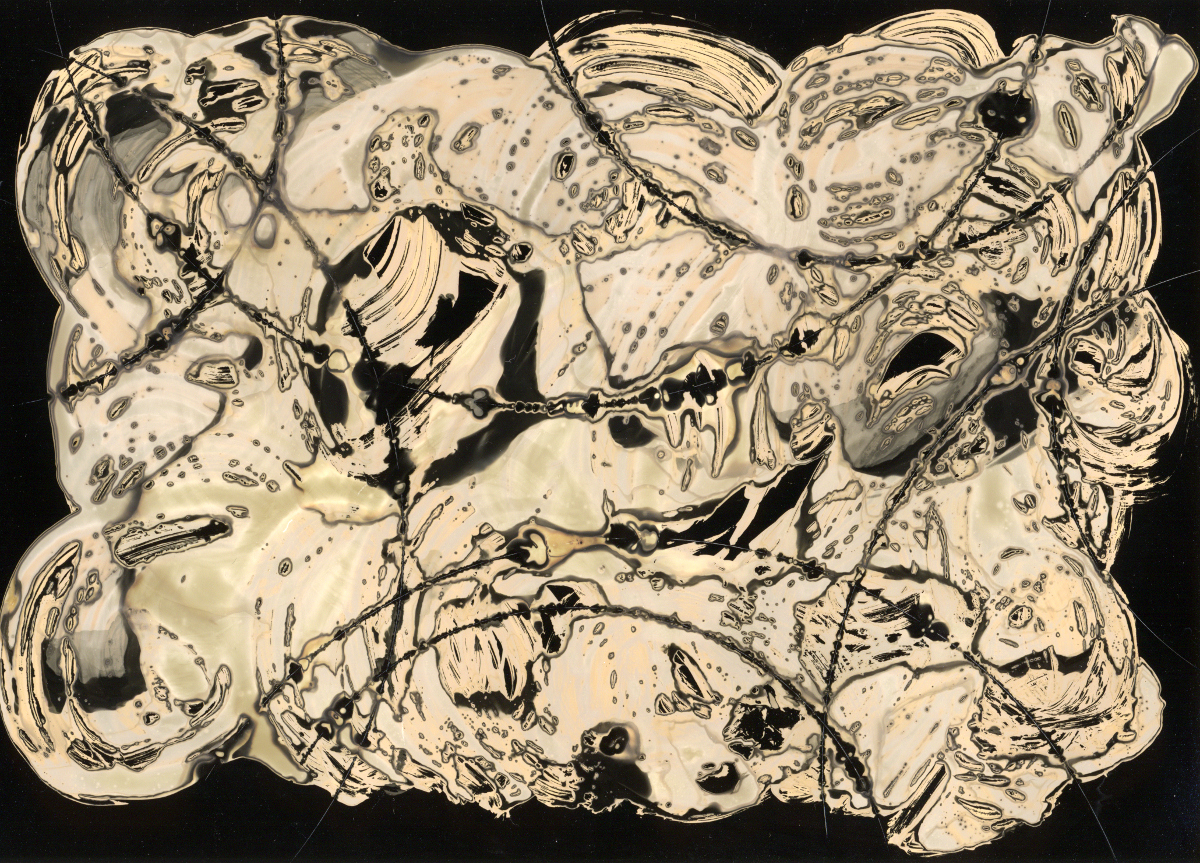
Chemigram with a resist of set honey.
The darker black and pure white areas seen at the edges and just below center were a result of the paper being exposed to the developer and fixer for their nominal processing time (~120 secs). The paler grays and dirty whites were a result of shortened exposure to the chemicals (~30 secs). The alternating bands of dark and light clearly illustrate how the resist was gradually dissolving while being switched between chemical baths.
Artists’ varnish & masking fluid resist
In a visit to the local art supplies store, I discovered a variety of different products that could serve as resists for the chemigram process. A random choice resulted in the acquisition of a bottle of Windsor & Newton Artists’ Acrylic Matt Varnish, and a bottle of Windsor & Newton Colourless Art Masking Fluid.
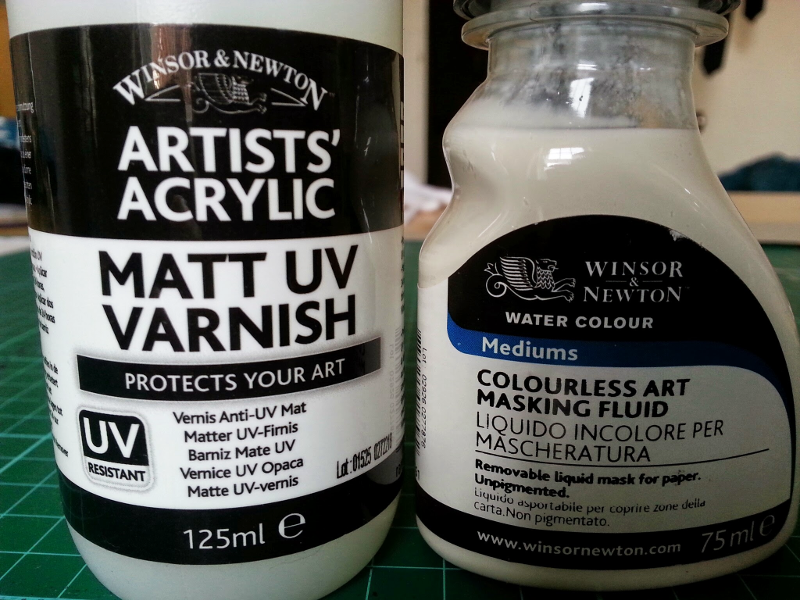
Artists varnish and masking fluid, to be tested as potential chemigram resists.
Once again some Ilford multigrade RC paper was used, three pieces were coated with the varnish and three pieces were coated with the masking fluid. In all cases the fluid was applied using a small paintbrush, but to investigate the effects of brush stroke pattern on the final image, different patterns were used when applying the fluids. In one the brush strokes were diagonal, in one they were horizontal and in the other they were completely random swirls. Interestingly there was an immediate effect on the colour of the paper – masking fluid turned it immediately blue while varnish turned it immediately pink. Neither colour would ultimately persist in the final image, so this difference in behaviour doesn’t appear to have a practical use.
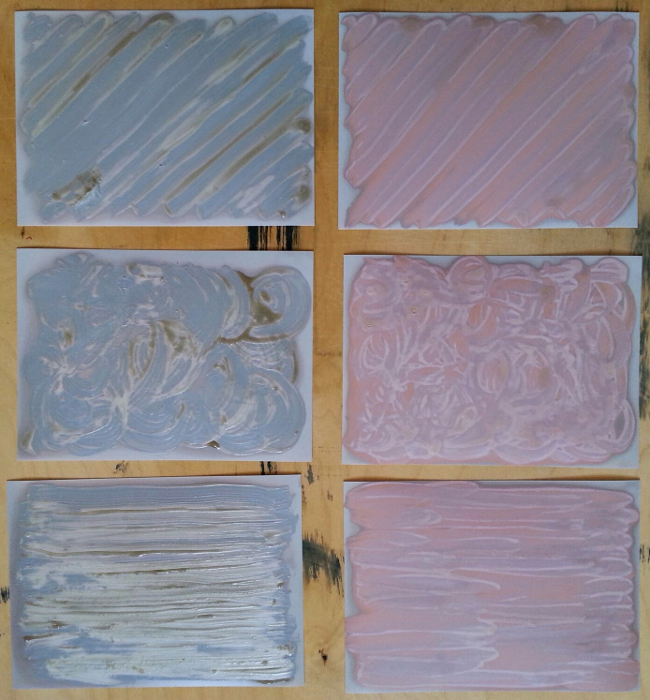
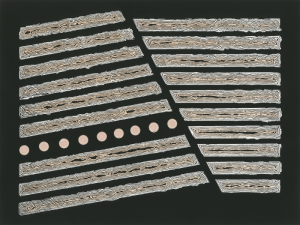
Papers coated with artists’ masking fluid (left hand column) and artists’ varnish (right hand column)
Once the resists were dry (only a matter of an hour or so) they were intentionally damaged. On some of the sheets of paper I used a knife to score some straight lines across the resist, while on others I used a compass with blade attachment to score some circles / arcs. The varnish was easily penetrated by the blade without applying any pressure. The masking fluid resist was slightly more difficult to score as it had quite a rubbery texture when dry – a sharp blade was required. Even now the rubbery dried masking fluid would come off the paper without much effort if rubbed.
As before the chemicals were Fotospeed fixer and Caffenol-C-H-UK developer. The sheets of paper were fully submerged in the chemical baths at each step, going back and forth several times. The artists’ varnish resist did not have much permanence, dissolving and flaking off in the chemicals very quickly. The image was almost entirely based on the pattern of the brush strokes used to apply the resist – scoring the mask had no perceptible effect. The developer appeared to penetrate the resist depending on its thickness to darken the image and the fixer removed the rest of the resist.
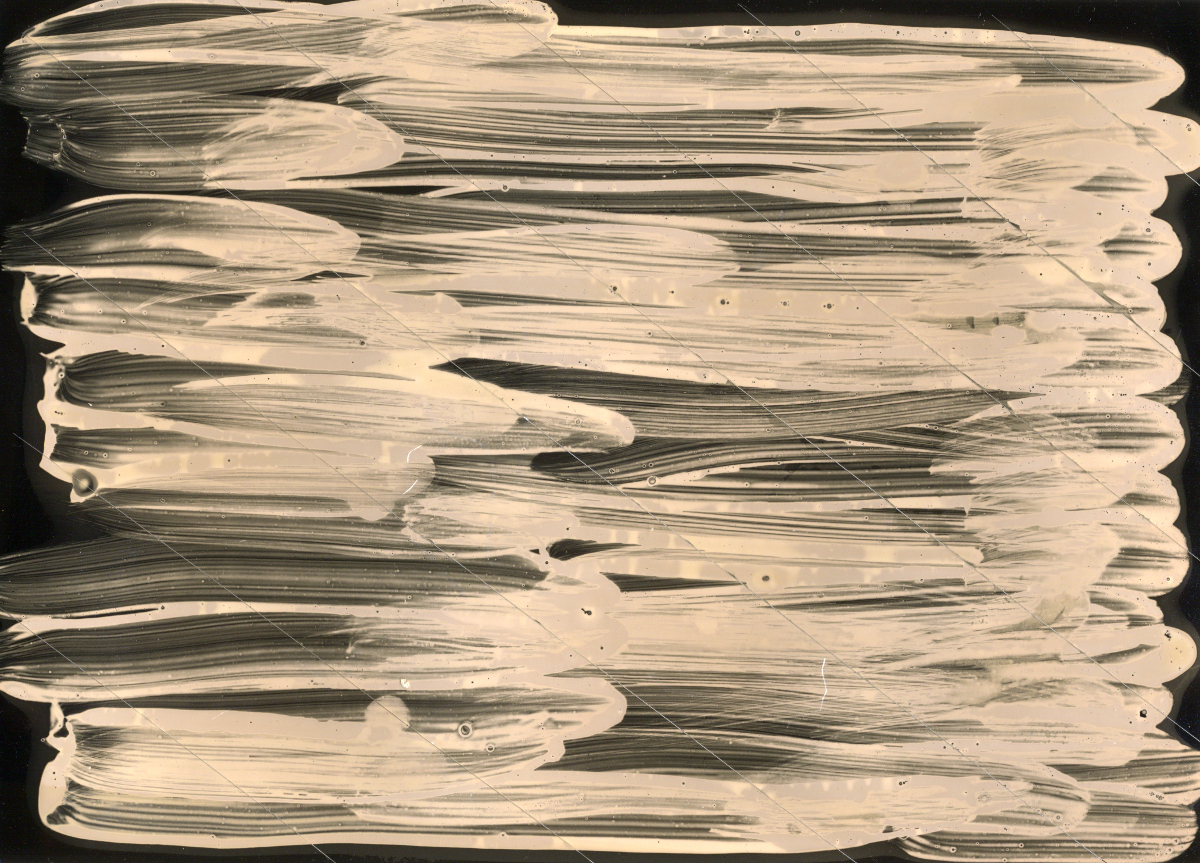
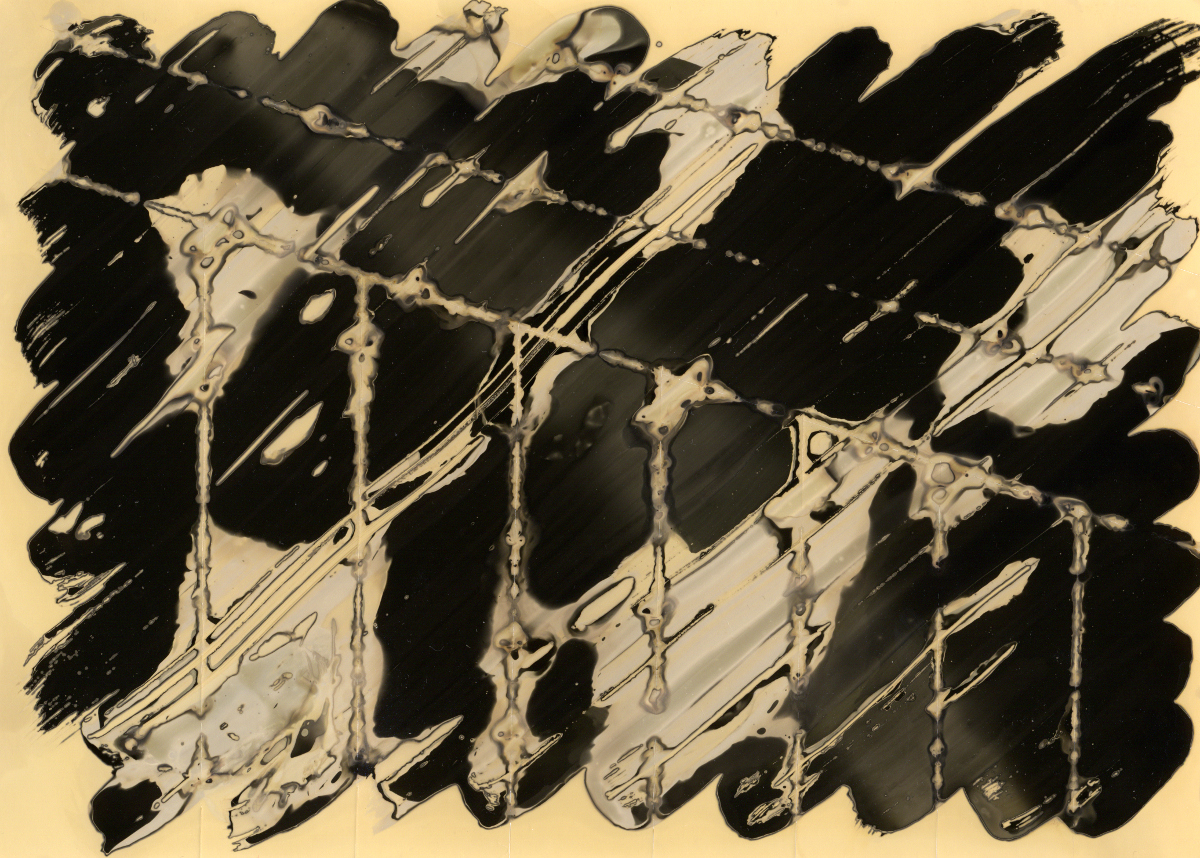
Windsor and Newton Artists’ Acrylic, Matt UV varnish resist. The only texture shown in the image matches the brush strokes of the resist. The chemicals penetrated the resist quickly and it dissolved & flaked off before any alternating bands would form
The resist using masking fluid was somewhat more satisfactory. It did not appreciably dissolve in the chemicals, not did they penetrate through the resist. The chemicals could work on the paper in areas where the resist had been scored with a blade. Rubbing on the resist would cause the rubbery mask to come away from the paper, though a gentle touch was needed otherwise massive amounts of resist would come loose in one go.
Windsor and Newton masking fluid resist, with circular marks scored into the resist with a compass and blade. Developer was first bath, hence black border
Windsor and Newton masking fluid resist, with straight lines scored by a knife. Fixer was first bath, hence white border.
Overall the artists varnish proved a disappointment, while the masking fluiding showed some hints of promise when damaging it with a knife. The ease of removal of the masking fluid when the image was finished was particularly appealing.
Stencils
For this experiment, instead of using a resist to control the action of the chemicals, it was decided to make a stencil. A piece of 3mm thick fibre/cardboard was used for the stencil and various circular holes were cut using a compass fitted with a blade. In addition, some pinprick holes were made randomly in the card
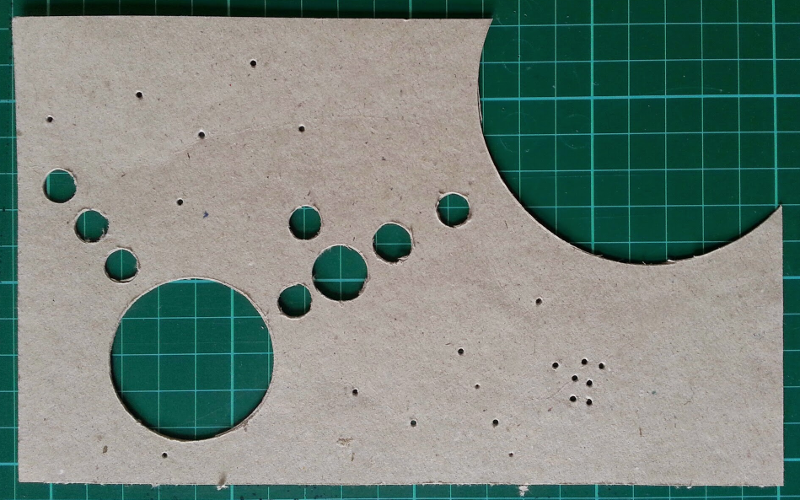
Piece of cardboard with spheres cut out to act as a stencil for applying developer/fixer to paper.
For its first use, developer was chosen as the chemical to paint in through the stencil. This resulted in a predominantly white background, with areas of black where the developer was painted. From the results it can be see that the developer soaked into the cardboard and run underneath the edges, so the outline on the image is far rougher than the stencil. There is an attractive highlight around the edges of the circles though – this appears to be something to do with the ineraction of the surface tension of the developer and the edge of the stencil.
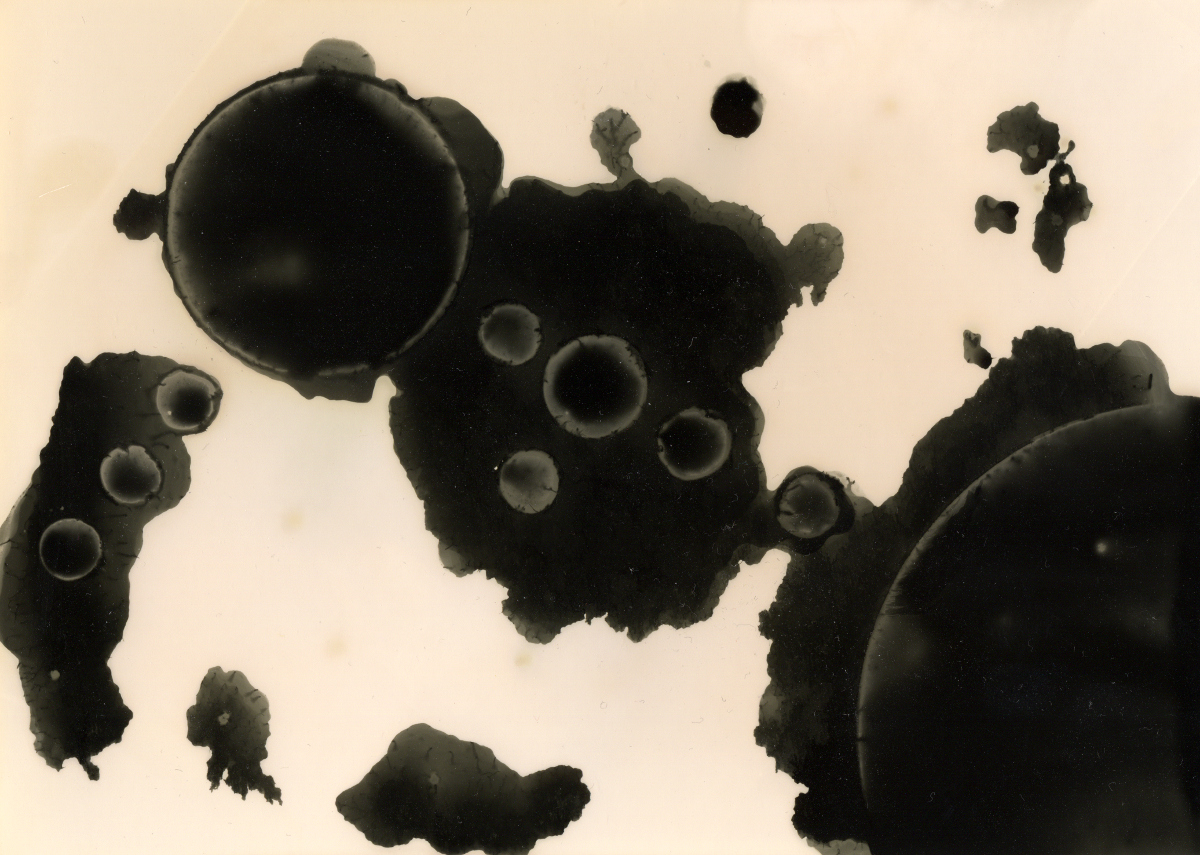
Cardboard stencil was placed on to the photo paper and developer painted into the holes. Developer washed off and then image fixed.
For the second use of the stencil, the fixer was picked as the first chemical to apply. The cardboard was fairly contaminated with developer from the first usage, which no doubt had an impact on the effectiveness of the fixer. The fixer was not left to act for long enough either. When the print was moved into the developer bath to form the background, even the areas exposed to the fixer initially darkened.

Cardboard stencil was placed on to the photo paper and fixer painted into the holes. Fixer washed off and then image placed in developer, followed by a bath in fixer.
The stencil idea is promising, but further investigations are needed to identify a more suitable material to use as the basis of the stencil. At the very least a less porous form of cardboard seems necessary. Alternatively it might be interesting to the use the stencil as a mask for the applying the resist, instead of directly applying the developer/fixer.
In the next part of the blog post, some further types of resist will be illustrated along with a method of creating a “stamp” for printing with chemicals.