Over the past few weeks I have written about experiments with the Chemigram process and most recently the Lumen printing process. When learning how to create Lumens, the intent was always to figure out how to then combine the technique with the chemigrams process to form hybrid works. The idea is that chemigrams excel at producing abstract images, while Lumens can produce some very detailed reproductions of objects being imaged. Combining the two techniques would hopefully allow the appealing aspects of both techniques to be presented in a single print.
As a refresher, with the chemigram process the image is formed by moving the paper back and forth between developer and fixer baths, often with some kind of resist applied to control the effects of the chemicals. When the desired image is achieved, a final archival fix and wash is performed. With the lumen process the image is formed by placing some object(s) on photographic paper and then leaving it in the sun for 20 minutes to many hours. When the desired image is achieved, a final archival fix and wash is again performed.
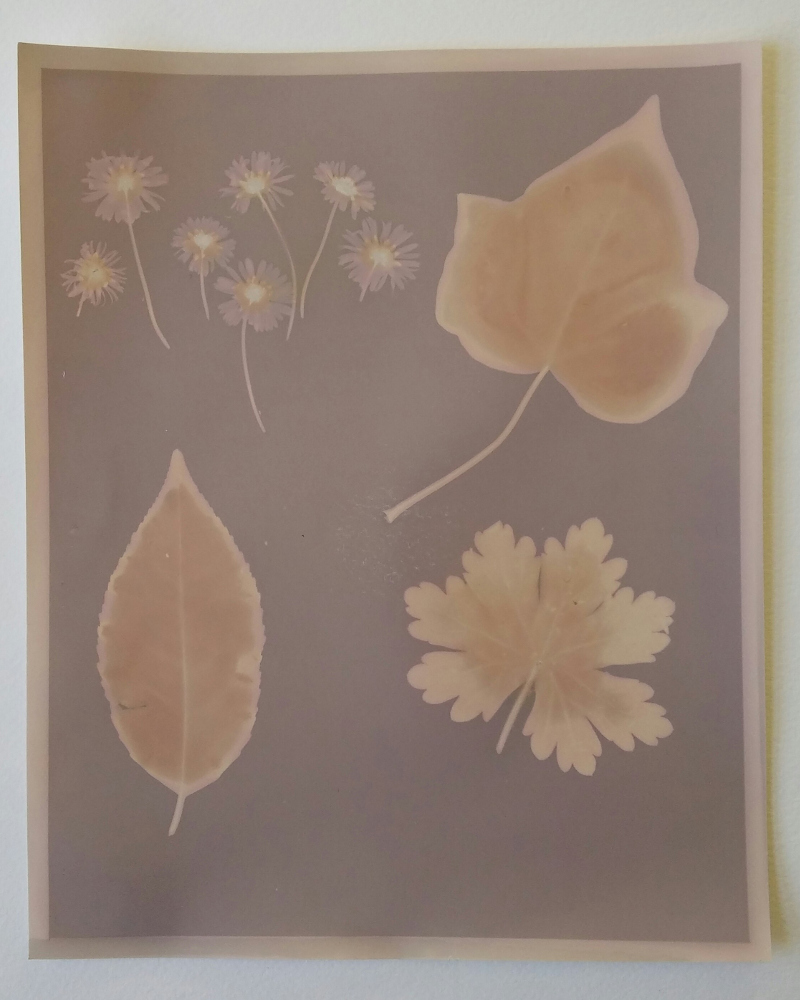
A Lumen print exhibiting varying colour tones. The image is dark purple where the paper was fully exposed, pale pink where fully obscured from light, and a yellow/brown where moisture from the leaves affected the paper
The approximate goal is to have certain regions of the paper processed with one technique, and the remainder of the paper processed with the other technique. The key challenge is figuring how to apply the processes so that their effects are localized. To expose the lumen image, the paper must not have been exposed to either fixer or developer. The chemigram process does not particularly care whether there is an image formed already, as the developer bath will obliterate any unfixed image. Thus the image formed by the lumen exposure must be protected from any developer used in the chemigram process.
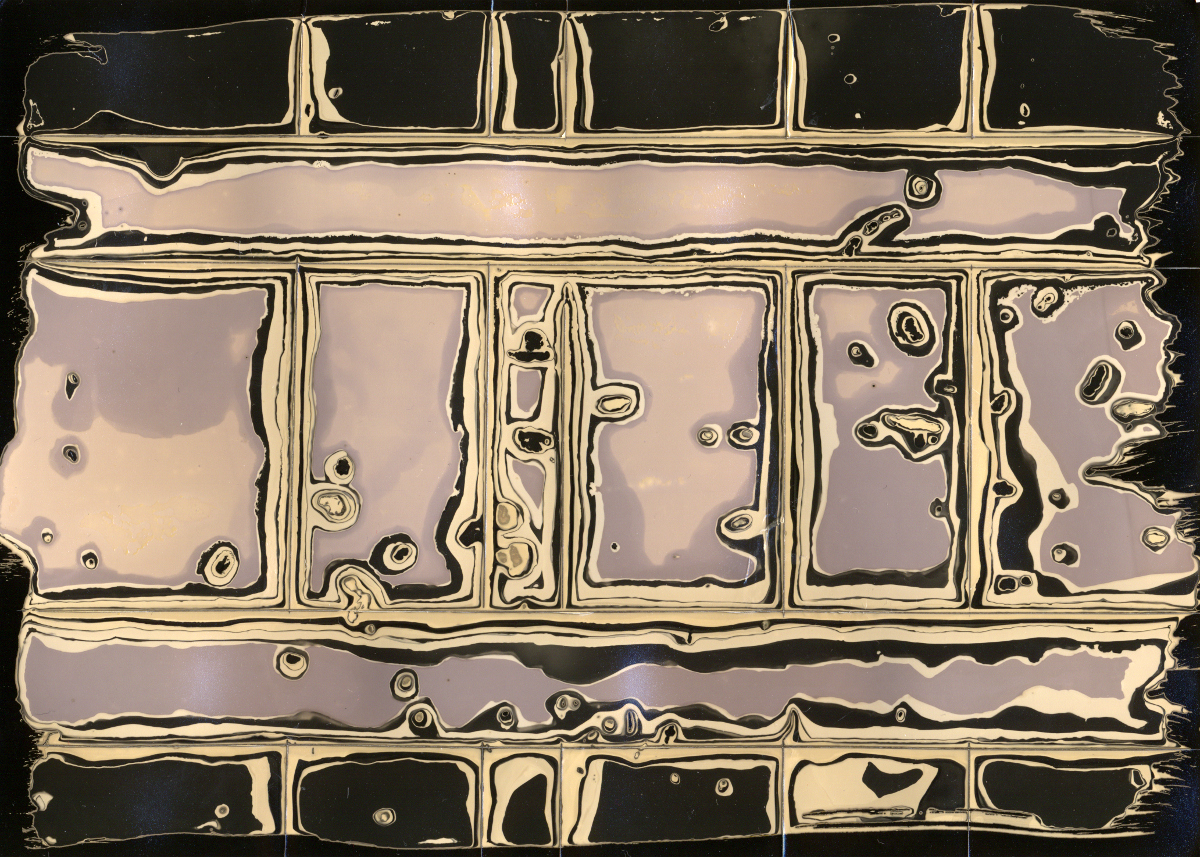
Chemigram created using wood varnish applied to the paper as resist, and left to dry for 24 hours. Lines scored in the varnish with a blade
A potential sequence of steps for combining the techniques would thus be
- Apply resist to the areas of the paper that will be using the chemigram process
- Expose the lumen image on the areas of paper not covered by resist
- Perform an archival fix on the paper, preserving the lumen image
- Switch between developer and fix, working on the chemigram resist
- Perform a second archival fix to preserve the chemigram image
Steps 1 and 2 can actually be reversed – the only requirement is that the resist be applied before doing the archival fix on the lumen image in step 3. If the chemigram resist is fairly strong, little of the fixer used in step 3 will penetrate, allowing plenty of opportunity to build up the chemigram image.
If one wants to use a soft chemigram resist, it may not be desirable to fix the lumen print before forming the chemigram image. One alternative idea would be to protect the exposed lumen image from the developer by applying a relatively hard resist over it. This gives a slightly different production sequence
- Expose the lumen image on the paper
- Cover the lumen image in a hard resist
- Apply a soft resist to areas of the paper that will be using the chemigram process
- Switch between developer and fix, working on the soft chemigram resist
- Switch to water/stop bath and remove the hard resist from the lumen image
- Perform an archival fix to preserve both the chemigram and lumen image
The hard bit is probably figuring out what is most effective as the resist over the lumen image, such that it avoids any effects from developer, while being easy to remove in a water bath.
In my first experiment at creating a hybrid I tried the first sequence using a dried flour and water paste as the hard resist for the chemigram. The flour paste was applied to a few regions of a sheet of outdated photo paper and left to dry out overnight. After that flowers were placed onto the areas not masked and exposed in the sun for 30 minutes to allow a lumen image to form

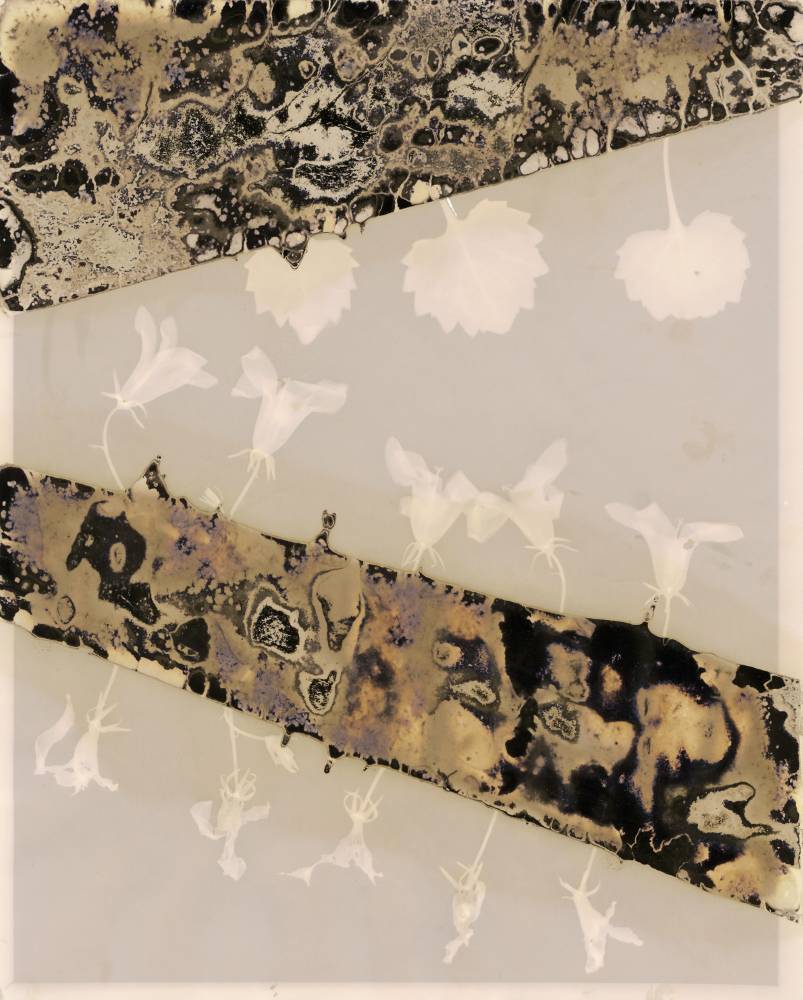
Exposing a lumen image on paper partially coated in a mask for future chemigram work.
Once the lumen image had formed, the paper was placed straight into the fixer bath for an archival quality fix, to preserve the lumen. As ever, it was slightly disappointing to see the intensity of the raw lumen image fade in the fixer, but what remained was still attractive. With the lumen phase out of the way, it was time to work the resist to form the chemigram image. As mentioned before, the flour paste forms a relatively hard resist once dry, so it took many switches back & forth between developer and fixer to work off the resist. The paper was flexed and rubbed to encourage the resist to break up and form the abstract patterns that characterize chemigrams. The final results were very satisfying for a first experiment
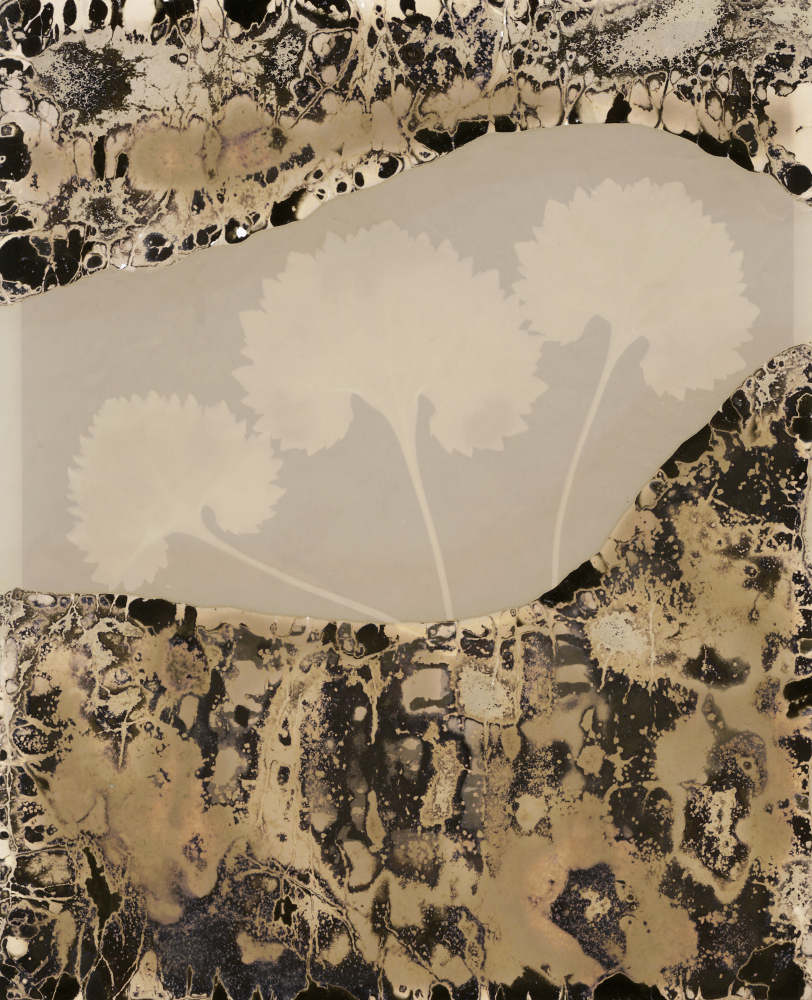
Resulting print after combining the chemigram and lumen processes.
Resulting print after combining the chemigram and lumen processes.
Despite only having made one attempt at combining the processes, the results clearly illustrate there is good potential in the overall idea. There are many avenues of exploration available to take it forward, and I’m thinking it’ll form the basis of an interesting project over the coming months.